There is absolutely no doubt that Microsoft Word is the most-used word processing application on the planet, especially in corporate environments.
Even though I can’t back that statement up with some relevant statistical data or a beautiful infographic, I can definitely back it up with 20 years of experience dealing with the publishing industry!
However, the fact that something is the most-used application doesn’t necessarily mean that everyone is adept at using it. As with all things, we humble users are often pressed for time and use software the way we were taught—if we were lucky enough to have received formal training.
There is often no time to investigate new ways of doing things. And even if you are inclined to want to know something, sometimes the correct search terms fail you.
In this article, I want to address some general ‘nuggets of Word wisdom’, including the differences between Office 365 and Office Suite, and Word for Windows versus Word for Mac. I’ll also share a few ‘hidden gems’ that I use to set up my workspace for increased efficiency, and some tools that will enable you to get more out of Word’s many features.
So, let’s dive right in!
Office 365 vs Office Suite
When Microsoft made its move to the cloud back in 2011, they faced the same marketing problem that Adobe would face a year later: both companies were never able to fully dissipate the perception that the software would now only work in a browser. So, let’s clarify what Office 365 is.
- A software distribution platform. Full versions of Microsoft Word for Windows, Microsoft Word for Mac, and Word for mobile devices, can be downloaded and installed from the Office 365 website.
- An online set of office tools. Like Google Docs, Office 365 offers what I would call ‘light’ versions of Word, PowerPoint, Excel, and OneNote, that work in the browser. They do not have the full functionality of a downloaded and installed version, but it is impressive what they do offer in their current versions. Personally, I really like the online Word environment since it is not so ‘bloated’ with features that you don’t use. Brilliant from an authoring perspective, but not nearly powerful enough for editorial work.
- A set of services. Most notably storage and collaboration in the form of OneDrive and, recently, the “creative storytelling” tool Sway.
Mac vs Windows
The Office Suite has had a Windows version and a Mac version for years, and in the beginning it really felt like the two applications came from different companies for their total lack of feature parity. The last few years have seen considerable effort on Microsoft’s behalf, and current versions are similar in many regards, but even today there are definitely some missing features.
Most notably for the way I work, the Mac version has no Style Inspector (explained below), and no way to disable linked styles (to be addressed in a future article). As a result, Word for Windows is my go-to choice if I want to troubleshoot a Word file. If it comes to the pure act of writing, the version really does not matter.
Setting up the workspace
In general, I use Word as a writing tool and for working with other people’s written files, either for troubleshooting or for adding additional structure. When writing, I usually start with a template and only use the Quick Styles area to apply headings as needed. But when working with other files I set up my workflow as follows.
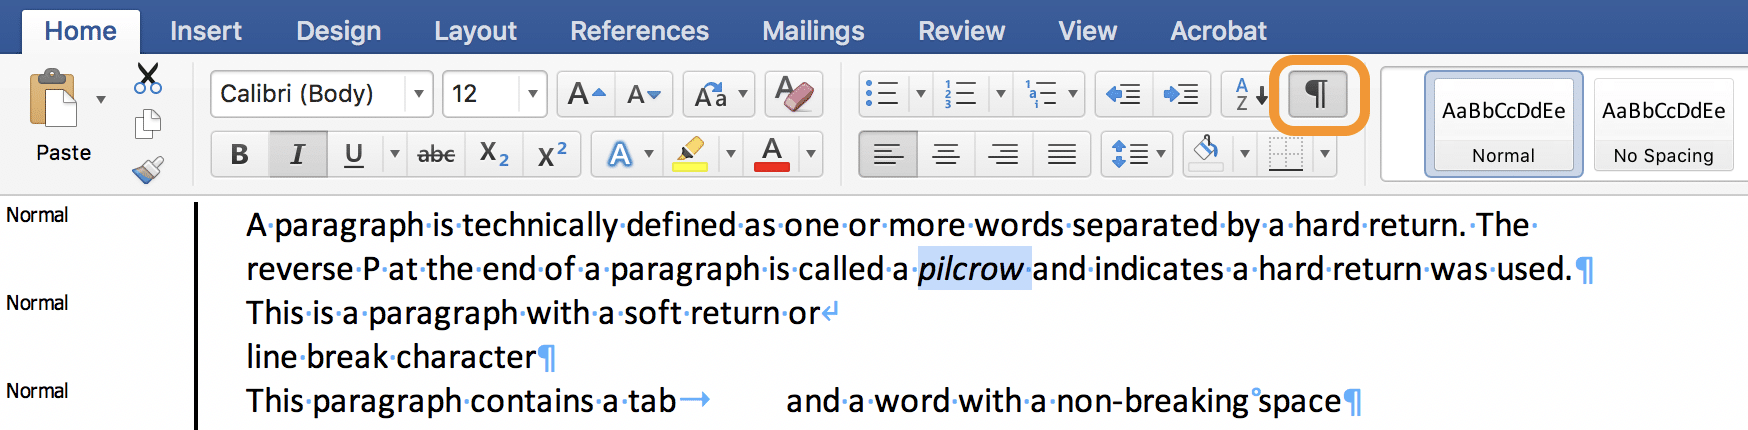
Invisible characters
When working with another person’s Word files it is imperative to be able to see the underlying structure and identify extra hard returns, line breaks, multiple spaces, multiple tabs, and so on. Enabling invisible characters (or hidden formatting marks) can be done by clicking the Show/Hide icon in the Paragraph group of the Home tab on both Mac and Windows.
Navigation pane
Headings are, without a doubt, one of the easiest ways to navigate a document. As such, I always work with the Navigation pane set to Headings so I can quickly and easily see a high-level overview of the document and easily navigate to a different portion. The Navigation pane serves like a clickable table of contents that is always visible.
Opening the Navigation pane in Windows
- Go to the View tab and select the checkbox next to Navigation Pane (or type Ctrl + F if you prefer keyboard shortcuts).
- Click the Headings tab in the Navigation pane.
- You can now click on any heading in the Navigation pane and be taken straight to that area in the document.
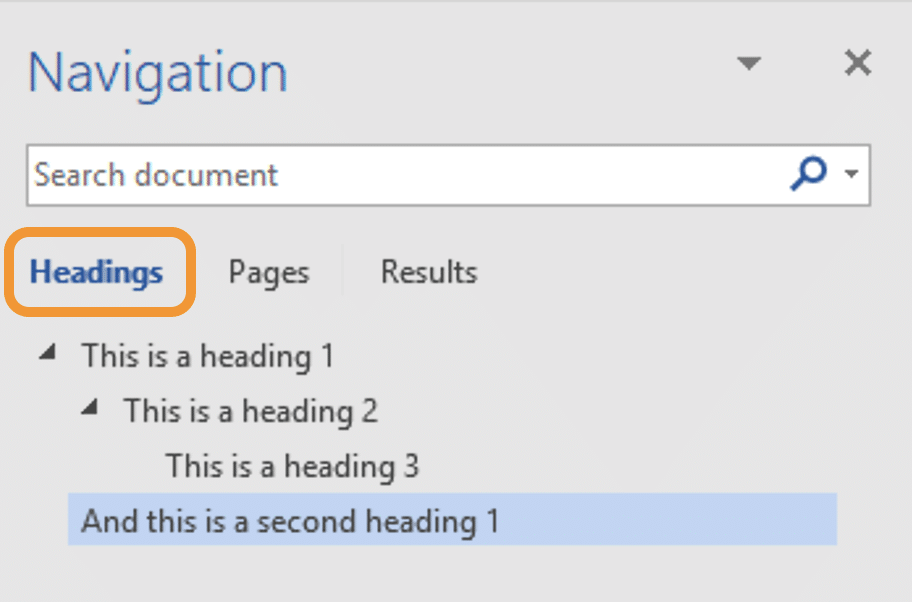
Microsoft Word Navigation pane (Windows).
Opening the Navigation pane on Mac
- Go to View in the ribbon and select the checkbox next to Navigation Pane, or click View (in the menu bar) > Sidebar > Navigation.
- Click the Headings icon in the Navigation.
- You can now click on any heading in the Navigation pane and be taken straight to that area in the document.
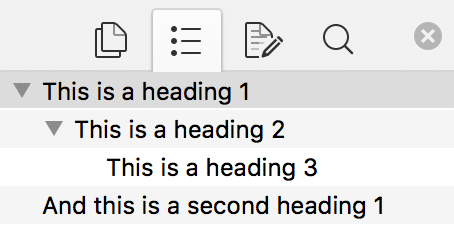
Microsoft Word Navigation pane (Mac).
Working in Draft mode
I like working in View > Draft mode because it is a distraction-free environment. But I am also very much interested in structure, and that means I want to be able to see paragraph styles easily. Luckily, there is a wonderful hidden feature for this that will instantly make you an advanced user.
Draft mode in Windows
- Click File > Options.
- Click Advanced.
- Scroll down to the Display.
- Set a value for Style area pane width in Draft and Outline views. I usually set it to 1 (it is at 0 by default) to start and then drag the demarcation manually.
- Click OK.
- Drag the demarcation to the right until you can see the full names of your paragraph styles.
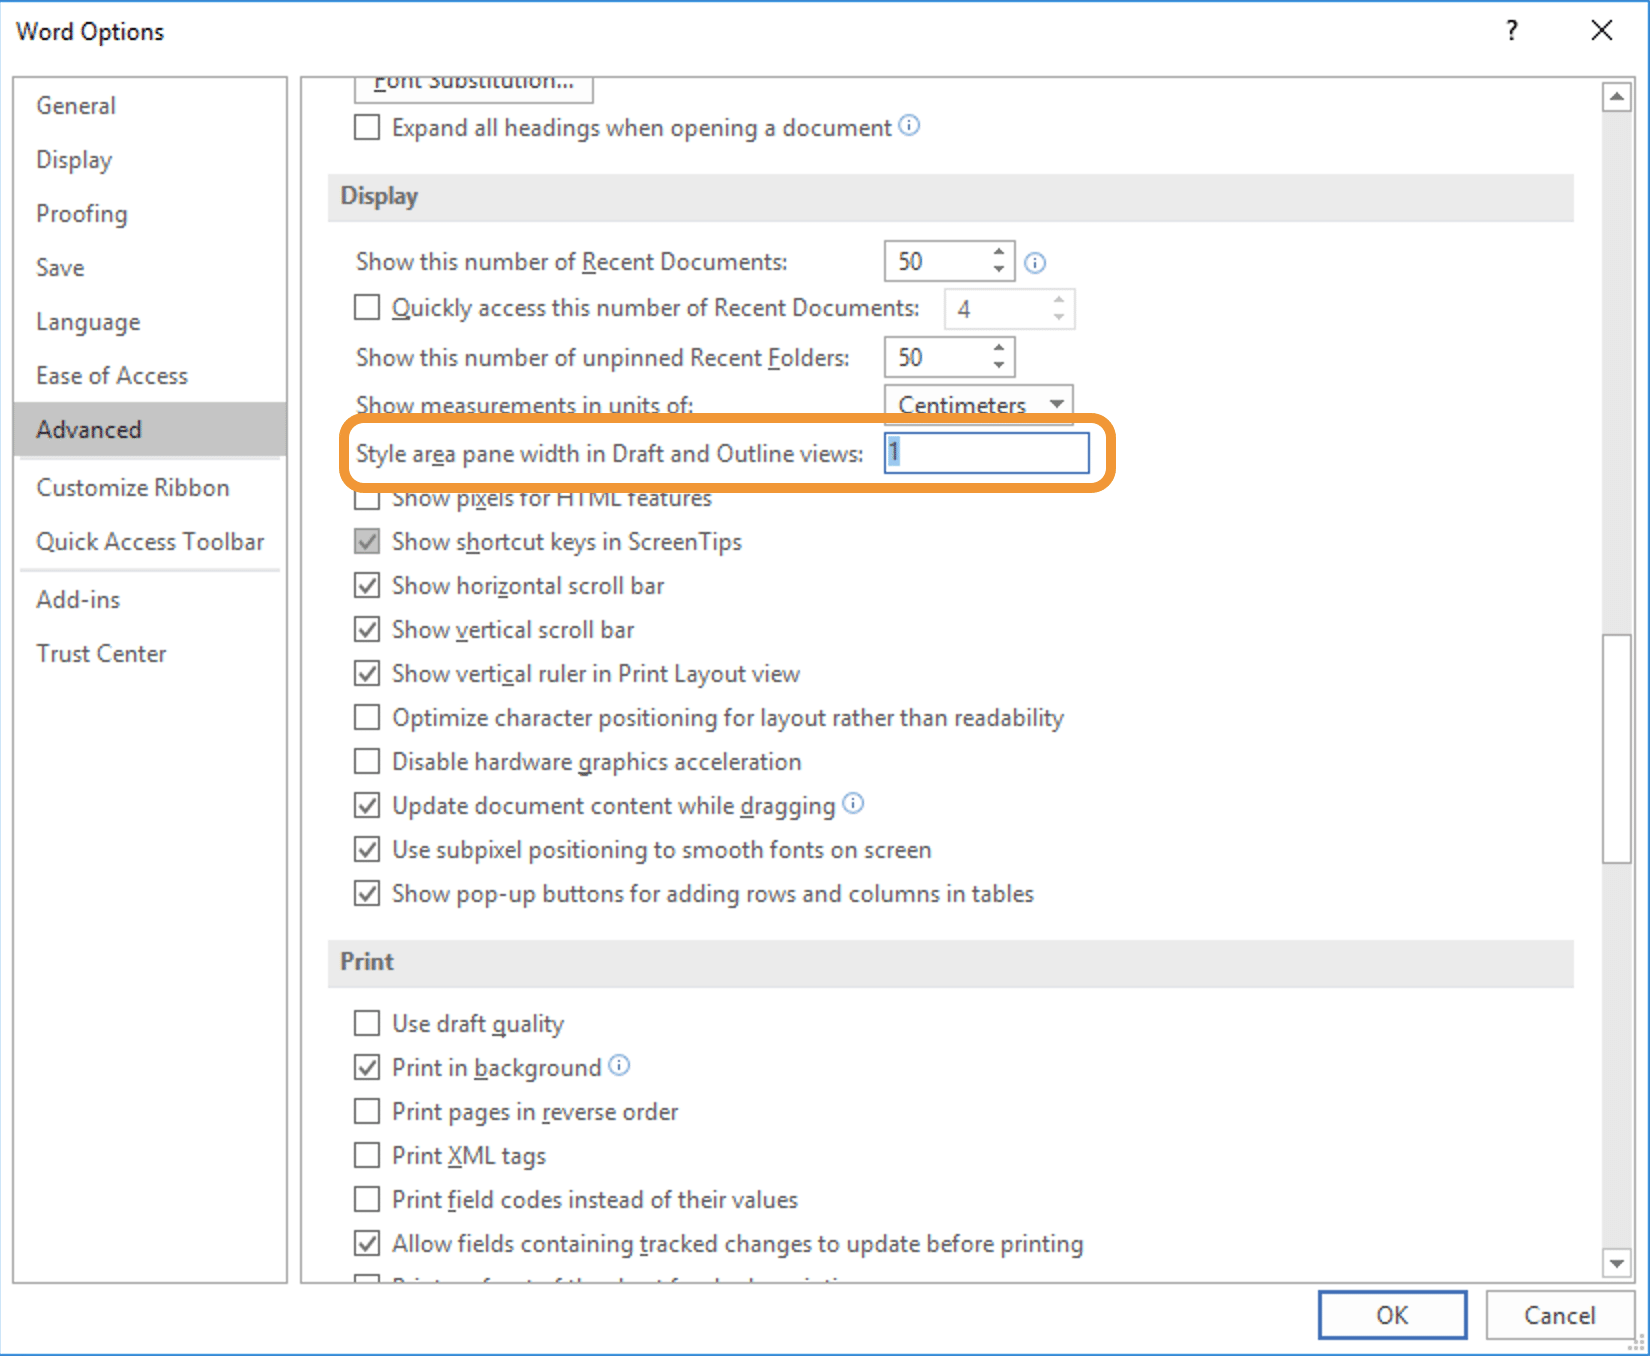
Microsoft Word Advanced Options (Windows).
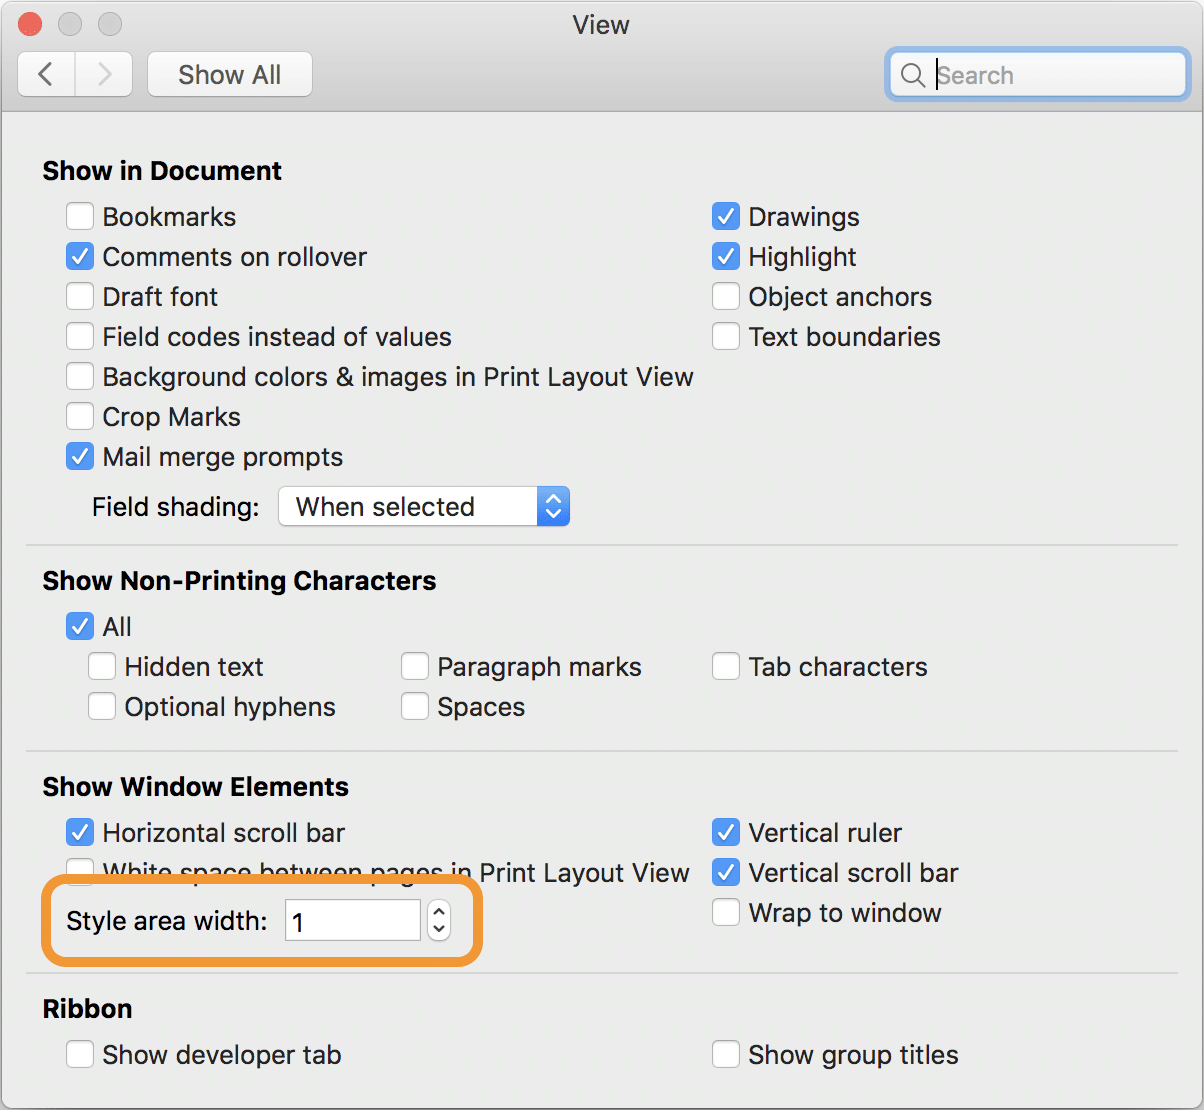
Draft mode on Mac
- Click Word > Preferences.
- Click View.
- Set a value for Style area width. I usually set it to 1 (it is at 0 by default) to start and then drag the demarcation manually.
- Close the Preferences.
- Drag the demarcation to the right until you can see the full names of your paragraph styles.
Microsoft Word View preferences (Mac).

Demarcation line in Word’s Draft view.
Working in Draft mode is very useful in general, but there is one important caveat: paragraph styles within table cells are not shown in Draft mode. Which brings us on to our next workflow setup: the Style Inspector.
Style Inspector
The Style Inspector is, without a doubt, the most useful tool when working with styles in Word. Amongst its many handy features, the following three stand out the most in day-to-day use.
- The Style Inspector instantly shows you whichever paragraph and character styles are applied to your current cursor position, wherever you put your cursor. I find this very powerful for a couple of reasons:
- Though paragraph and character styles are highlighted by Word in the Styles pane, Word never focuses on the style, so you have to scroll through a sometimes extensive list and find the highlighted one.
- As stated previously, Draft mode doesn’t show what paragraph styles are applied within tables, but our good friend Style Inspector does.
- The Style Inspector shows you any instances of local formatting and styling applied on top of paragraph or character styles.
- Perhaps more importantly, the Style Inspector allows you to easily remove any instances of local formatting you don’t want.
Accessing the Style Inspector in Windows
The Style Inspector is a bit of a hidden gem that requires a couple of steps to open.
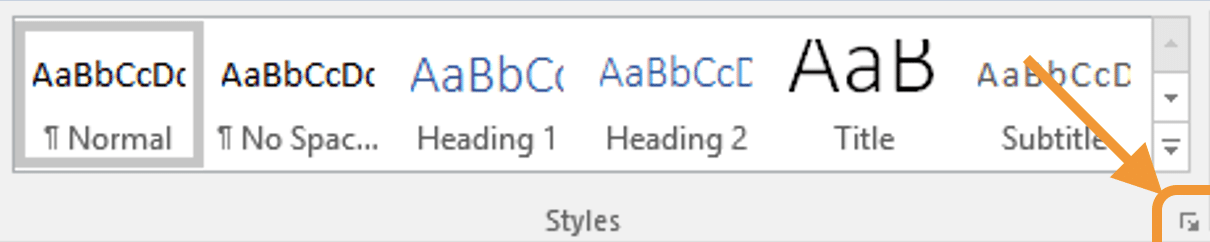
- Click the Home tab in the ribbon.
- Open the Styles pane by clicking on the little arrow icon below the styles. If you prefer keyboard shortcuts, it can be opened using Ctrl + Alt + Shift + S.
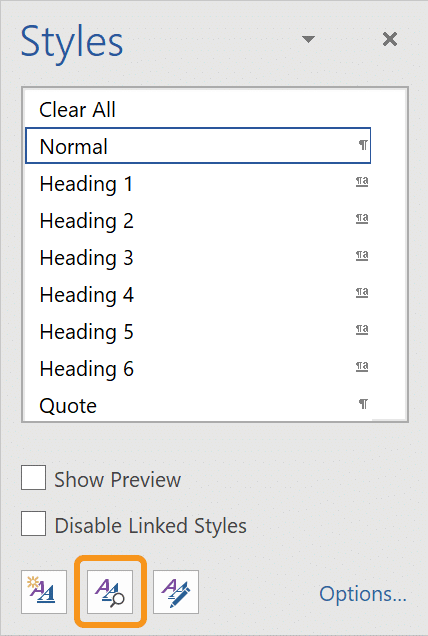
- Click on the Style Inspector in the Styles pane: the middle icon with the looking glass.
Microsoft Word Styles panel (Windows).
Style Inspector button in the Styles pane.
Accessing the Style Inspector on Mac
Unfortunately, the Style Inspector is one of those features that just didn’t make it into the Mac version of Word. There is a Reveal Formatting tool under View > Reveal Formatting but it lacks so many of the features that I consider it unusable.
Using the Style Inspector
After opening the Style Inspector, you can put your cursor anywhere in a paragraph to view the styling information for that entire paragraph. You can also select some text within a paragraph to look specifically at attributes for that particular selection.
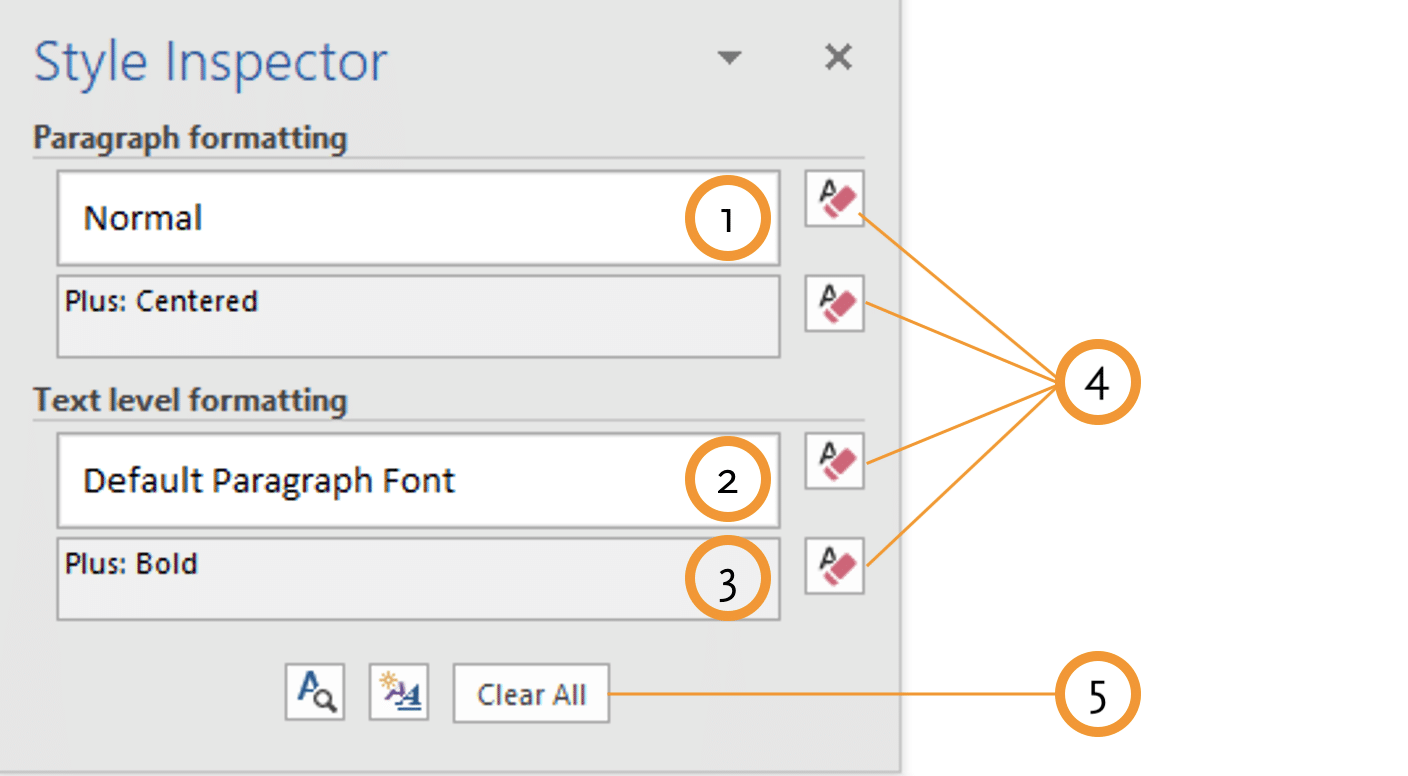
Microsoft Word Style Inspector (Windows).
The Style Inspector shows you:
- The current paragraph style for your selection.
- The current character style (if any) for your selection.
- Any different formatting that is not applied by a paragraph or character style.
The eraser icons (4) allow you to remove any individual attributes, such as paragraph, character, or local formatting. This is by far the easiest way to clean up styling.
The Clear All button (5) removes all local formatting and resets the paragraph to Normal.
Try it out for yourself!
The tools described in this article are particularly useful for anyone working with structure and styles in Word; however, nearly all Word users can benefit from them, so give them a go!

Guy van der Kolk
Product Manager | Netherlands
Guy van der Kolk first got hooked on publishing while attending an international school in Ivory Coast, where he used Pagemaker, Photoshop and an Apple Quicktake 100 camera to help create the yearbook. After many hours of hard work, while holding the final printed product, he knew this was an industry he wanted to be a part of.
Having spent the first 17 years of his life in West Africa, Guy is fluent in three languages and has a multicultural background that has served him well in his career. As an IT consultant and trainer for an Apple Premium reseller and now as a Senior Solutions Consultant for Typefi (based in the Netherlands), he has spent the last 15 years training thousands of people to get the most out of their software.