Accessibility is no longer optional—it’s a requirement under numerous laws, including the European Accessibility Act and the Americans with Disabilities Act.
It’s also just plain good to do. If your content isn’t accessible, you’re effectively excluding people from engaging with it. Making your content accessible means that everyone can consume it, which is good for your numbers too.
According to the World Health Organization, about 16 per cent of people globally have some type of disability. On top of that, more than 2.2 billion people experience vision impairment. If your content isn’t accessible, you’re missing these key audiences.
True inclusivity includes accessibility, and if you publish documents, that means they must be accessible. The good news is that Adobe InDesign, the industry-standard desktop publishing tool, has all the tools you need to publish accessible documents.
What are the core principles of accessibility?
We’ll get to the practical InDesign stuff in a minute. First, we need to discuss the core principles of what makes something accessible.
Why? Because laws like the European Accessibility Act don’t mention PDFs, InDesign, or specific features like alt text and colour contrast. They generalise a bit so their laws can apply to all types of content, and they do it through these core principles.
The core principles of accessibility are:
- Perceivable
- Understandable
- Operable
- Robust
OK, that’s it! Now go make your documents accessible.
Obviously we’re kidding. The point is that on their own, these principles leave out the details. You have to think about them in the context of your content to figure out what they really mean—but don’t worry, because we’ve done that part for you.
Here’s what the accessibility core principles mean for document accessibility and InDesign:
Perceivable
This means that any information you present must be available to the reader via multiple sensory channels. In terms of documents, that could mean adding alt text and providing semantic structure.
Understandable
If a disabled reader can consume your content but can’t make sense of it, the content is useless. You can avoid this by ensuring your document has a logical reading order so assistive technologies “read” it just like a sighted reader. You should also include language tagging so the reader knows what language the content is in.
Operable
All users must be able to navigate and interact with your documents. You can use InDesign to easily create a table of contents (TOC) to aid in navigation. You should also add hyperlinks within the TOC that link to the chapters or sections in your document.
Robust
To be accessible, your content must be compatible with assistive technologies like screen readers. That means using compliant formats like PDF/UA or EPUB, and adding metadata to your document.
How can I make accessible documents with InDesign?
To publish accessible documents using InDesign, you should use these features:
- Alt text
- Semantic structure
- Logical reading order
- Language tagging
- Table of contents
- Hyperlinks
- Metadata
You must also output your content in either PDF/UA or EPUB formats.
Below, we’ll explain how to implement each of these features using InDesign. Keep in mind that some of these features are only available in InDesign 2024 (v19) or later.
Alt text
To add alt text to images in InDesign:
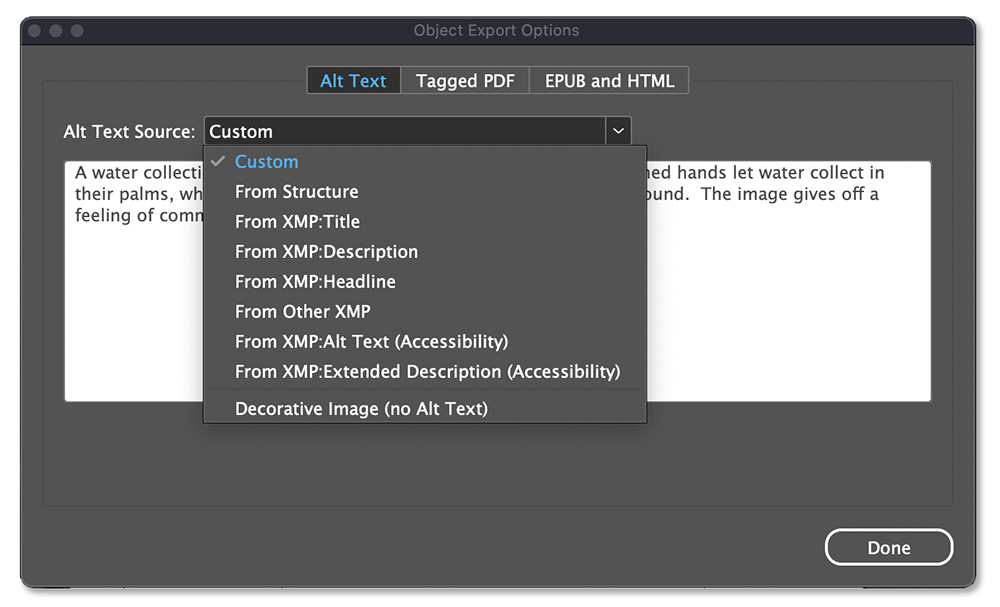
- Right-click on an image in your document and select Object Export Options (you can also click on the image and find this option within the Object menu at the top of the window).
- In the panel that appears, select the Alt Text tab.
- If the image needs a description, set the Alt Text Source to Custom and type or paste your alt text in the box below.
- If the image is purely decorative and should be ignored by assistive technology, set the Alt Text Source to Decorative Image (no Alt Text).
- In the Tagged PDF tab, just make sure both dropdown menus are set to From Structure.
- In the EPUB and HTML tab, you can leave everything as-is.
TIP 1: The Object Export Options modal floats, meaning you can leave it open as you move between image frames—you don’t have to close the modal each time.
TIP 2: With the Object Export Options modal open, swap to your Direct Selection tool and click on the image inside the image frame—then you’ll only see options within the modal that are applicable for images.
Semantic structure
To create semantic structure in a document using InDesign, you need to use Paragraph Styles. Every type of text in your document should have a Paragraph Style applied to it, and it should make logical sense.
For example, your main title should have its own style, and that style should be tagged as H1 or heading one. Similarly, each level of subheading should also have its own style, and they should be tagged H2, H3, etc.
Here’s how to apply structure tags using InDesign Paragraph Styles:
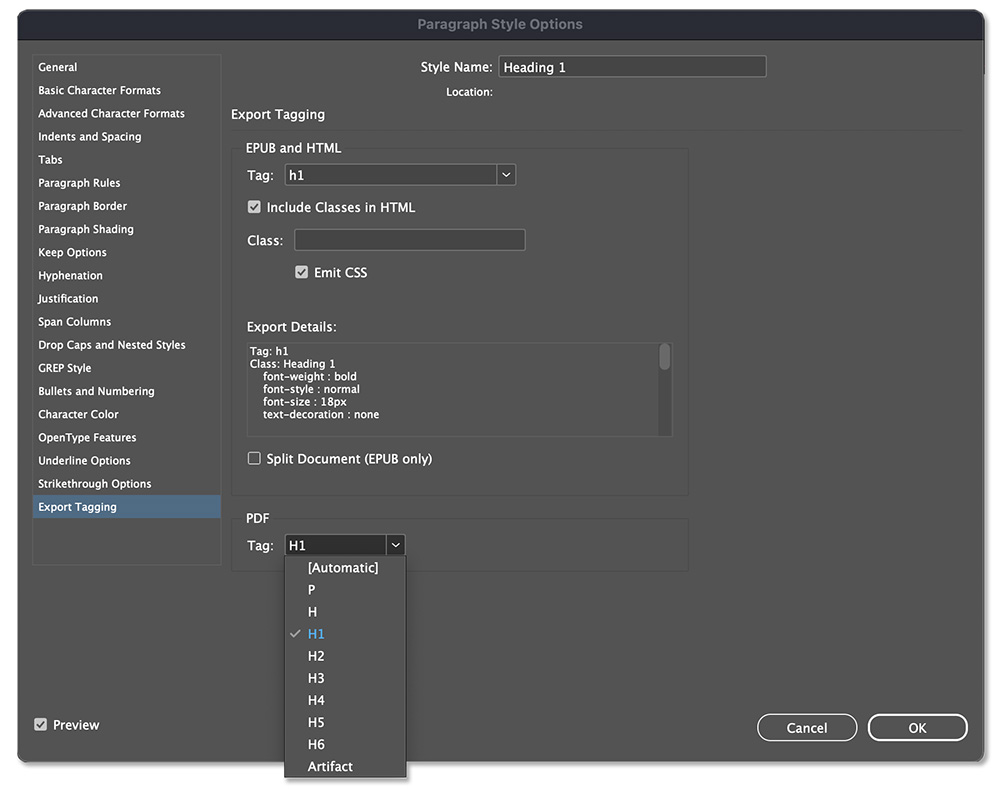
- Edit a Paragraph Style by right-clicking on it within the Paragraph Styles panel and selecting Edit.
- In the dialogue that appears, select the Export Tagging tab near the bottom of the list on the left side.
- Set your tags using the dropdown menus for both EPUB and HTML, and PDF export. You can set headings to H1 through H6 depending on the heading level. Body text and captions should be set to P for paragraph.
- If the text can be ignored by assistive technology, set the tag under PDF to Artifact.
When you set these tags within the Paragraph Style, they will apply to all the text in your document with that Paragraph Style applied.
Reading order
There are a few different ways to control the reading order using Adobe InDesign.
Tag Tree reading order
The most important reading order is the Tag Tree reading order.
To set the Tag Tree reading order in InDesign, you should thread your text frames for each story in your document. Using a single text frame per page (divided into columns if necessary) is an easy way to achieve this.
For most simple designs, this is the only thing you need to do to achieve a fully compliant Tag Tree reading order.
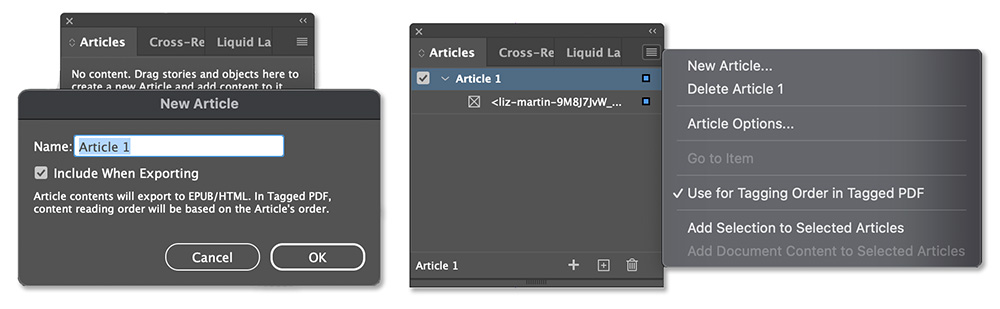
For more complex designs with lots of pieces, you may have to use the Articles panel to ensure the reading order is logical—but threading your text frames is still the best way to make sure everything makes sense.
If you do use the Articles panel, make sure you include everything in your document—anything left out won’t be tagged. Also make sure to check Include When Exporting for each item you add, and check Use for Tagging Order in Tagged PDF within the panel settings.
Architectural reading order
The Architectural reading order is second in terms of importance for PDFs, but it’s the most important thing when exporting to EPUB, HTML, or XML.
The order of items in the Layers panel controls the Architectural reading order. The order goes from bottom to top, so the thing that should be read first must be at the bottom in your layer order.
The best practices are to minimise the number of text frames and design elements you use and use just one layer per document. Within that layer, you can drag items up and down to change the reading order. If you must use multiple layers, remember that the order will still go from bottom to top.
TAB reading order
This reading order determines the order of items in your document when an assistive technology user presses a key or gives a voice command to advance to the next item in the document.
As with the Tag Tree reading order, the most important piece of this is threaded text frames. If you’ve already set this up, then you’re mostly there.
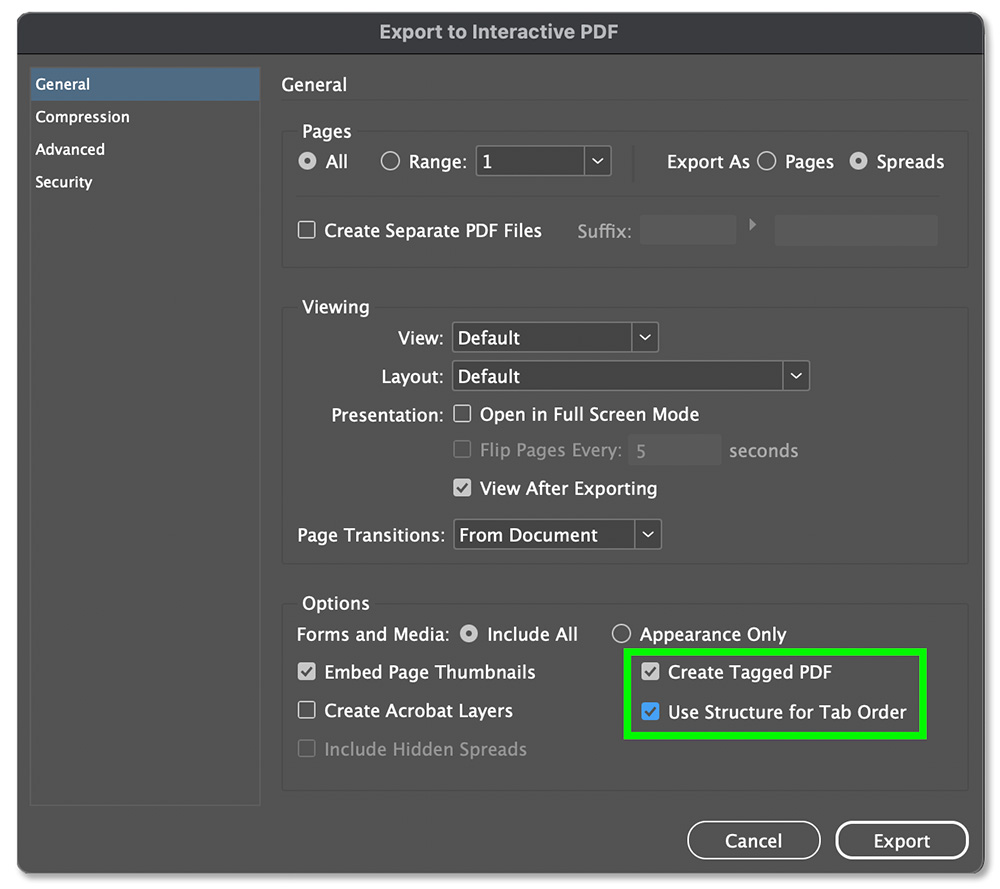
The other crucial piece of TAB reading order is a setting called Use Structure for Tab Order—you must enable this and another setting called Create Tagged PDF in the export settings when exporting to Interactive PDF.
Language tagging
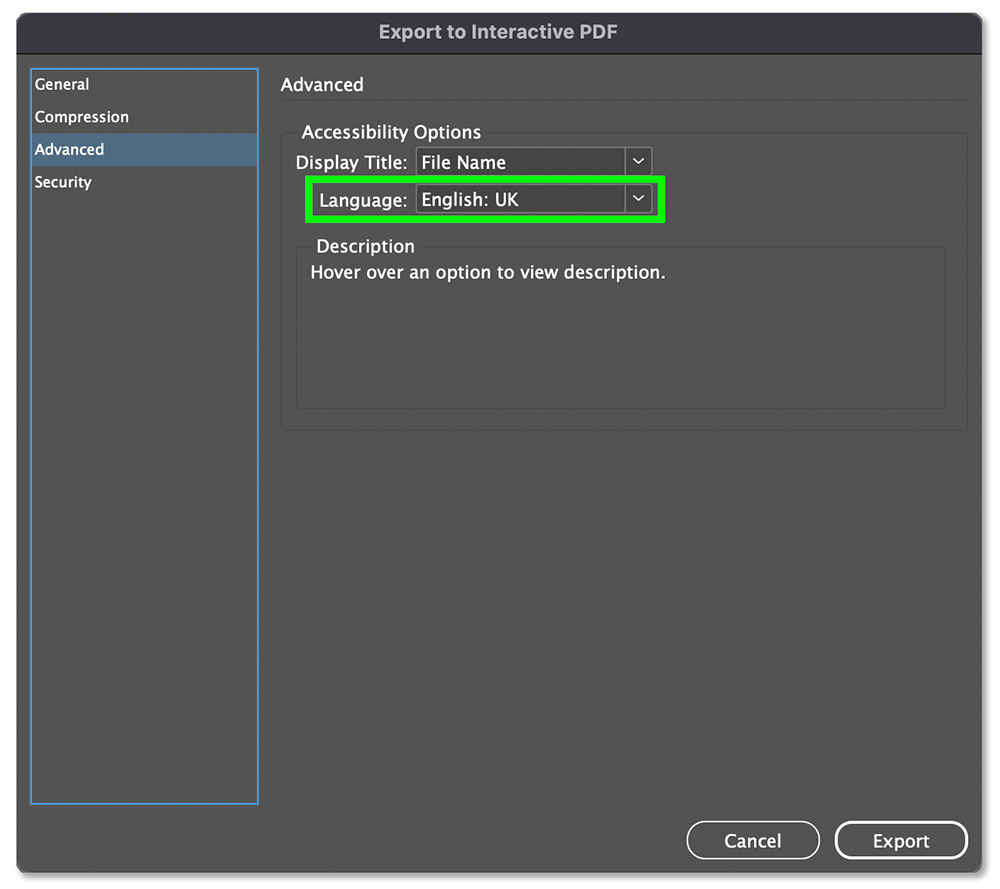
This is how to set the document language when exporting an Interactive PDF from Adobe InDesign:
- Within the File menu at the top of the window, select Export, then select Adobe PDF (Interactive) in the dropdown menu at the bottom of the Export window.
- Select a destination to save your file, give it a name, then click Save at the bottom right.
- In the window that appears, select the Advanced tab. Set the document language using the Language dropdown menu.
- Click Export to generate a PDF based on your settings.
What if there are multiple languages in my document?
Not to worry, there’s an easy way to take care of this using InDesign Paragraph and Character Styles.
First, decide which language is the primary language for your document—you’ll set this one within the Export window as described above. For the other languages, here’s what to do:
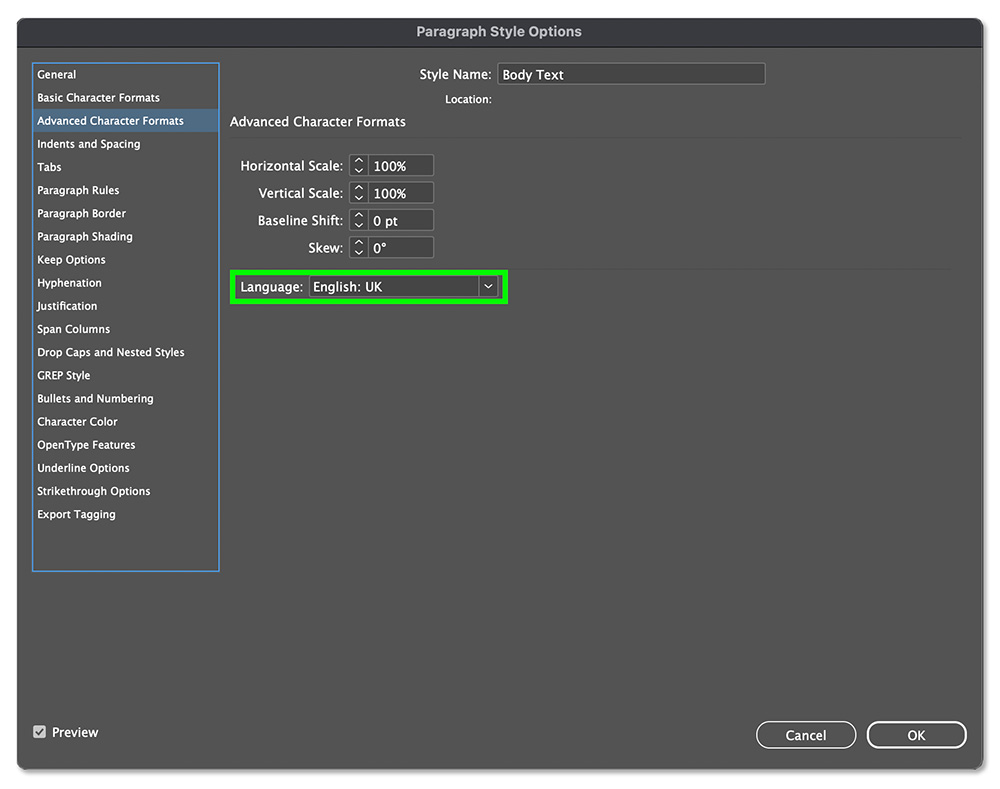
- Create a Paragraph Style or Character Style for your other language. Right-click on it within the applicable styles panel to Edit.
- Click on the Advanced Character Formats tab in the list on the left side.
- Set the language using the Language dropdown menu.
Once you do that, you just have to make sure you apply the style you created to the text that’s in another language.
For larger blocks of text like paragraphs, it’s easier to use a Paragraph Style. If you only need to identify one or a few words in another language, then use a Character Style.
Table of contents
InDesign has some powerful built-in tools to make creating a table of contents (TOC) very simple (as long as you’ve used Paragraph Styles properly).
To create a table of contents in InDesign:
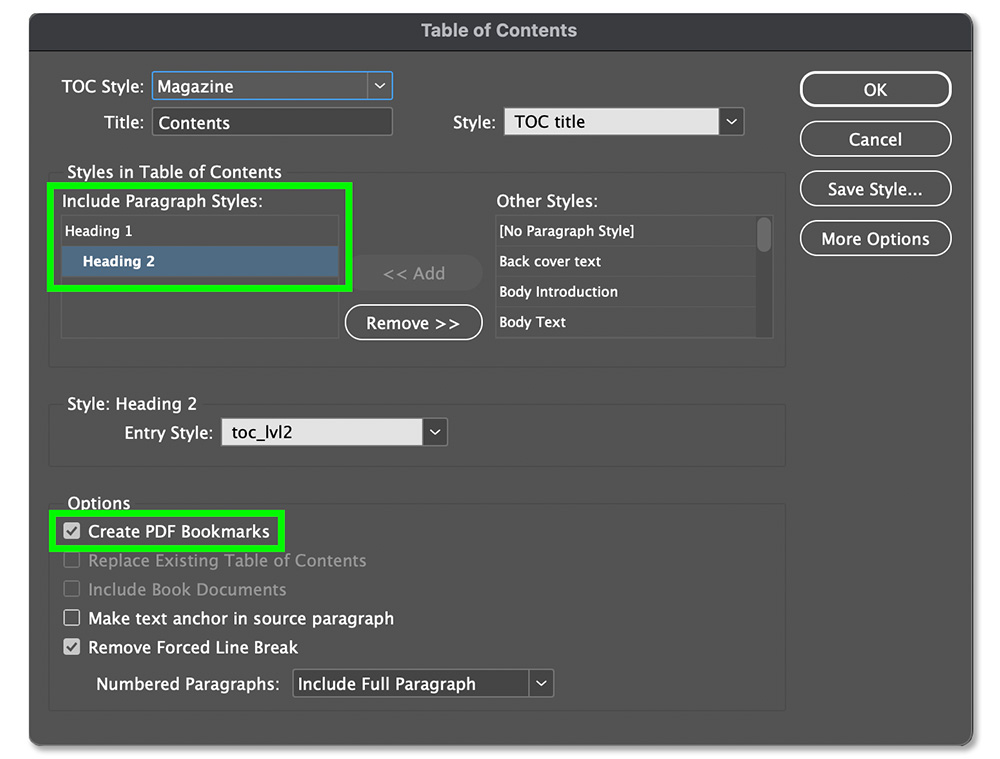
- Within the Layout menu at the top of the window, select Table of Contents.
- Within the dialogue that appears, you can define a title, a Paragraph Style to style the TOC text, and much more. The most important thing here is to include the Paragraph Styles that you want to appear as lines in the TOC (another great reason to use Paragraph Styles consistently for your headings).
- Make sure Create PDF Bookmarks is checked (this will create internal hyperlinks from the TOC to sections within the document). Click OK.
- The cursor will now change to show a tiny thumbnail of a text box—click or drag on a page in your document to place the TOC you just created.
If you make any changes to the headings in your document, you’ll need to update the TOC. To do this, select the TOC text frame, go back to the Layout menu at the top of the window, and select Update Table of Contents.
TIP: If you want a navigable TOC to appear in the interactive PDF but don’t want it to show up on the page, move the TOC frame to the pasteboard. You can also make it non-printing: within the Window menu at the top of the window, hover over Output then select Attributes, then check the box for Nonprinting.
Hyperlinks
Internal hyperlinks
Adobe InDesign makes it really easy to create internal hyperlinks from your table of contents to parts of your document. If you want to add more internal hyperlinks throughout your document, there are just a few steps to follow.
First, you need to create link anchors (the destinations for each link). To create link anchors in an InDesign document:
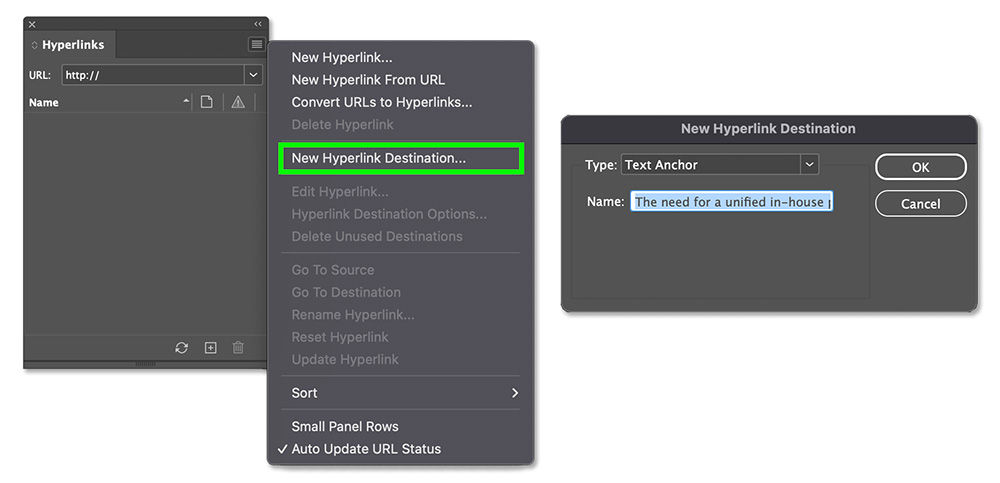
- Highlight the text that you want to be the anchor or link destination.
- Within the Window menu at the top of the InDesign window, go to Interactive and select Hyperlinks.
- In the hamburger menu within the Hyperlinks panel (three lines at the top right), select New Hyperlink Destination with your destination text still highlighted.
- In the dialogue that appears, make sure the dropdown is set to Text Anchor and click OK.
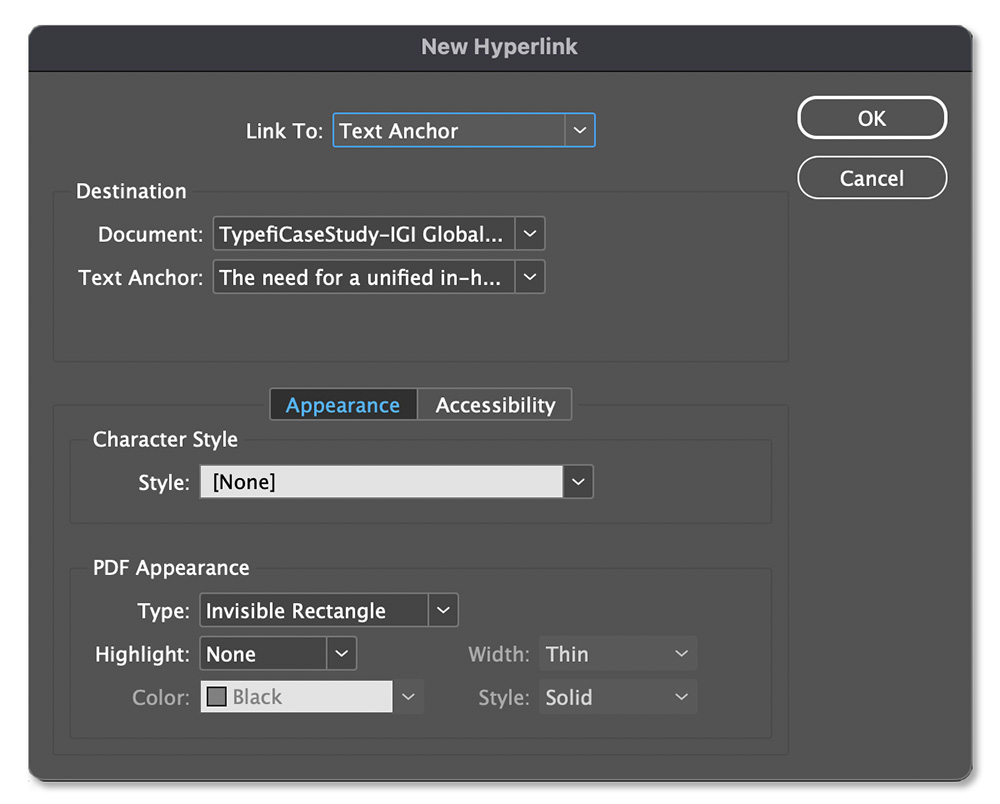
Now, with your text anchor created, here’s how to create a hyperlink from the source to that destination within the document:
- Select the text you want to turn into a hyperlink.
- Within the Hyperlink panel, click the plus icon at the bottom right.
- In the dialogue that appears, make sure the Link to: dropdown is set to Text Anchor.
- In the Text Anchor: dropdown, choose the text anchor you want to link to.
- Under the Accessibility tab, make sure to include a brief description of the link (alt text).
- Click OK to create the hyperlink.
External hyperlinks
You can also easily create external hyperlinks within your InDesign document that link to websites. The steps are very similar, but you don’t need to create link anchors.
Here’s how to create external hyperlinks in InDesign:
- Select the text you want to turn into a hyperlink.
- Within the Hyperlink panel, click the plus icon at the bottom right.
- In the dialogue that appears, make sure the Link to: dropdown is set to URL.
- Paste your URL in the field under Destination.
- Under the Accessibility tab, make sure to include a brief description of the link. That way, assistive device users will know where the hyperlink goes. If you don’t include this, assistive devices will read the URL itself, which is often a meaningless string of characters.
- Click OK to create the hyperlink.
TIP: You can define styling for both internal and external hyperlinks within the New Hyperlink dialogue. In the Appearance tab at the bottom of the dialogue, you can specify a Character Style to give the hyperlink a specific appearance on the page. You can also define how the link will appear in interactive PDFs.
Metadata
Don’t forget about metadata! This is crucial information that tells assistive technology users what the title of the document is, who wrote it, and much more.
To set PDF metadata using InDesign:
- Within the File menu at the top of the window, select File Info near the bottom.
- The dialogue that appears will default to the Basic tab. Here, you can define common document metadata like the title, author, short description, copyright, etc. There are quite a few other categories in addition to Basic—make sure you check them so you don’t miss anything.

Publish accessible documents faster
If you follow this guide, every document you create in Adobe InDesign will be accessible.
Yes, there are lots of steps to accessible document publishing in InDesign—but it’s worth the effort to publish truly inclusive content that can reach a wider audience.
To ensure you didn’t miss anything, we recommend running your final output through an accessibility checker after publishing. These accessibility checkers are accurate and trustworthy:
- ACE by Daisy (EPUB)
- PAC 24 (PDF)
There is also one other crucial component of accessibility that we didn’t discuss here: colour contrast.
Colour contrast is a design decision, and it’s important for partially sighted readers. It’s also a requirement for compliance with WCAG 2.0, 2.1, and 2.2.
There are plenty of checking tools out there to help you achieve proper contrast. We recommend these colour contrast tools:
- Colour Contrast Analyser by TPGi
- Contrast Checker by WebAIM
Can I automate accessible publishing?
As you probably realise now, the tasks required to publish an accessible document in InDesign are repetitive. They can get very tedious for long documents, especially if your publishing volume is high.
The good news is that you can automate accessibility in InDesign! But to do it, you need a specialised accessible publishing automation tool.
Typefi automated publishing software is the only tool that can automate everything we outlined in this guide and publish up to 1000 pages of accessible content per hour using Adobe InDesign.
If you publish a large volume of accessible documents, then Typefi can potentially save you multiple weeks of work per document.
Just ask PCI, which reduced publishing time from 7 weeks to only 4 hours, or Rhino-Rack, which cut production time from 1 month to just 3 days with Typefi.
Get in touch with our team, and we’ll talk you through how it works and set up a custom demo so you can see Typefi in action.
Thanks for reading. Hopefully this guide helps you publish accessible content faster!

Lukas Kaefer
Marketing Manager | United States
Lukas has more than 10 years of experience as a copywriter and marketer, with a deep background in SEO and eCommerce. He has produced content for a vast range of clients and has managed email marketing and social media strategy for multiple online brands. He’s also an experienced graphic designer and video editor, working with a variety of Adobe tools since the Creative Suite era.
He brings all this experience to Typefi, where he continues to expand his knowledge in areas including accessibility, XML, desktop publishing, and the wonders of Adobe InDesign. In his spare time, Lukas loves to surf, snowboard, fish, and play guitar.