Adobe InDesign is a powerful and complex publishing application. It has a seemingly endless set of tools and features to make layout design and long document publishing as easy as possible.
One of the most powerful aspects of InDesign is the ability to create styles—Object Styles, Paragraph Styles, Table Styles, etc. These features can save you heaps of time, but are you getting the most out of them?
In this article, I’ll cover five of my favourite features buried within InDesign styles. The theme here is saving time—all these methods will help you reduce tedious, repetitive styling tasks in InDesign. I hope you find them useful!
1. Apply styles faster with Nested Styles
Many publications contain repetitive patterns of styling which are tedious to apply manually.
Using Find/Change is one solution. It’s great for applying lots of formatting in one shot, but if the content changes and you need to reapply the styling, it can be a headache.
Using Nested Styles is a better solution. Nested Styles are very flexible and they’re quick and easy to apply—the only requirement is a consistent pattern in the text.
In this example, there’s a consistent pattern in the list of steps which is a perfect candidate for Nested Styles.
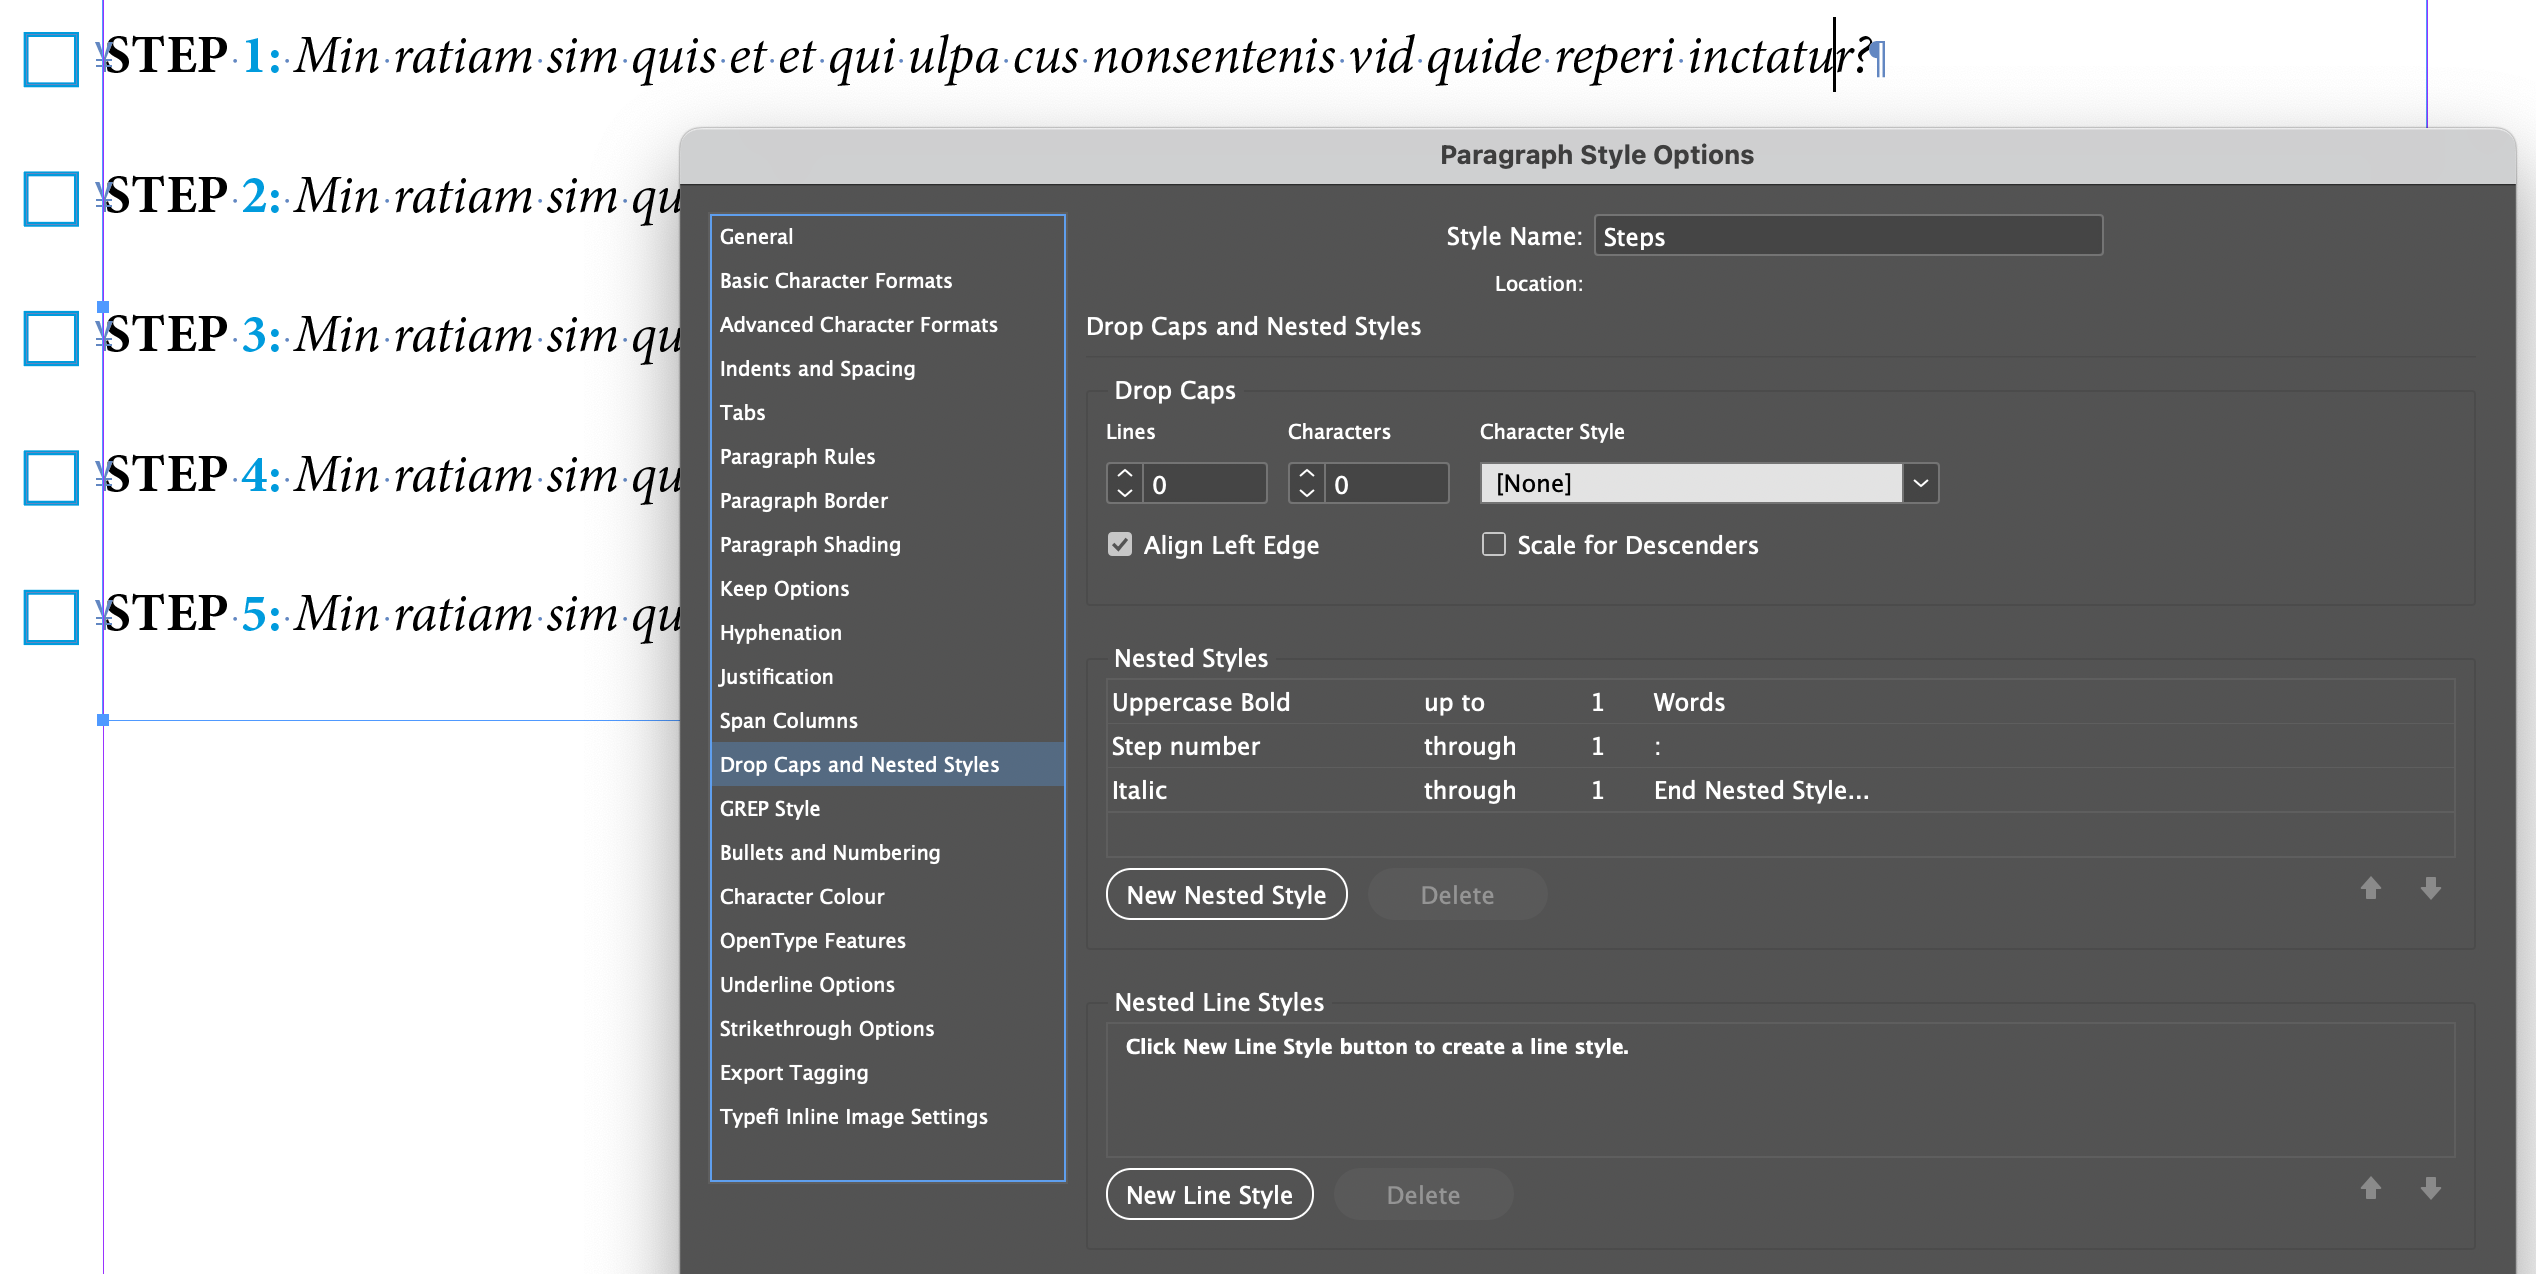
Three nested Character Styles have been applied starting from the left of each line.
- “Uppercase Bold” applies formatting to the first word only.
- “Step number” applies from the second word up to and including the first colon.
- “Italic” applies from immediately after the colon to the end of the paragraph. In this style, there is also an “End Nested Style” marker—without it, the formatting will automatically apply until the end of the paragraph.
Using this method, any text in the document that follows this pattern will have the same styling applied. The styles will remain as long as the pattern remains the same. If the pattern changes, just update the Nested Style options.
2. Use GREP for complex styling
When things get more complicated, Nested Styles may not be enough. GREP Styles can bridge the gap since they offer more powerful pattern matching capabilities that work anywhere in a paragraph.
Similar to Find/Change, GREP searches for a specific text pattern—but with GREP, the Character Style is applied directly to the search results. Set the search pattern once to apply the styling wherever the patter is found and reapply it every time the content is updated or changed.
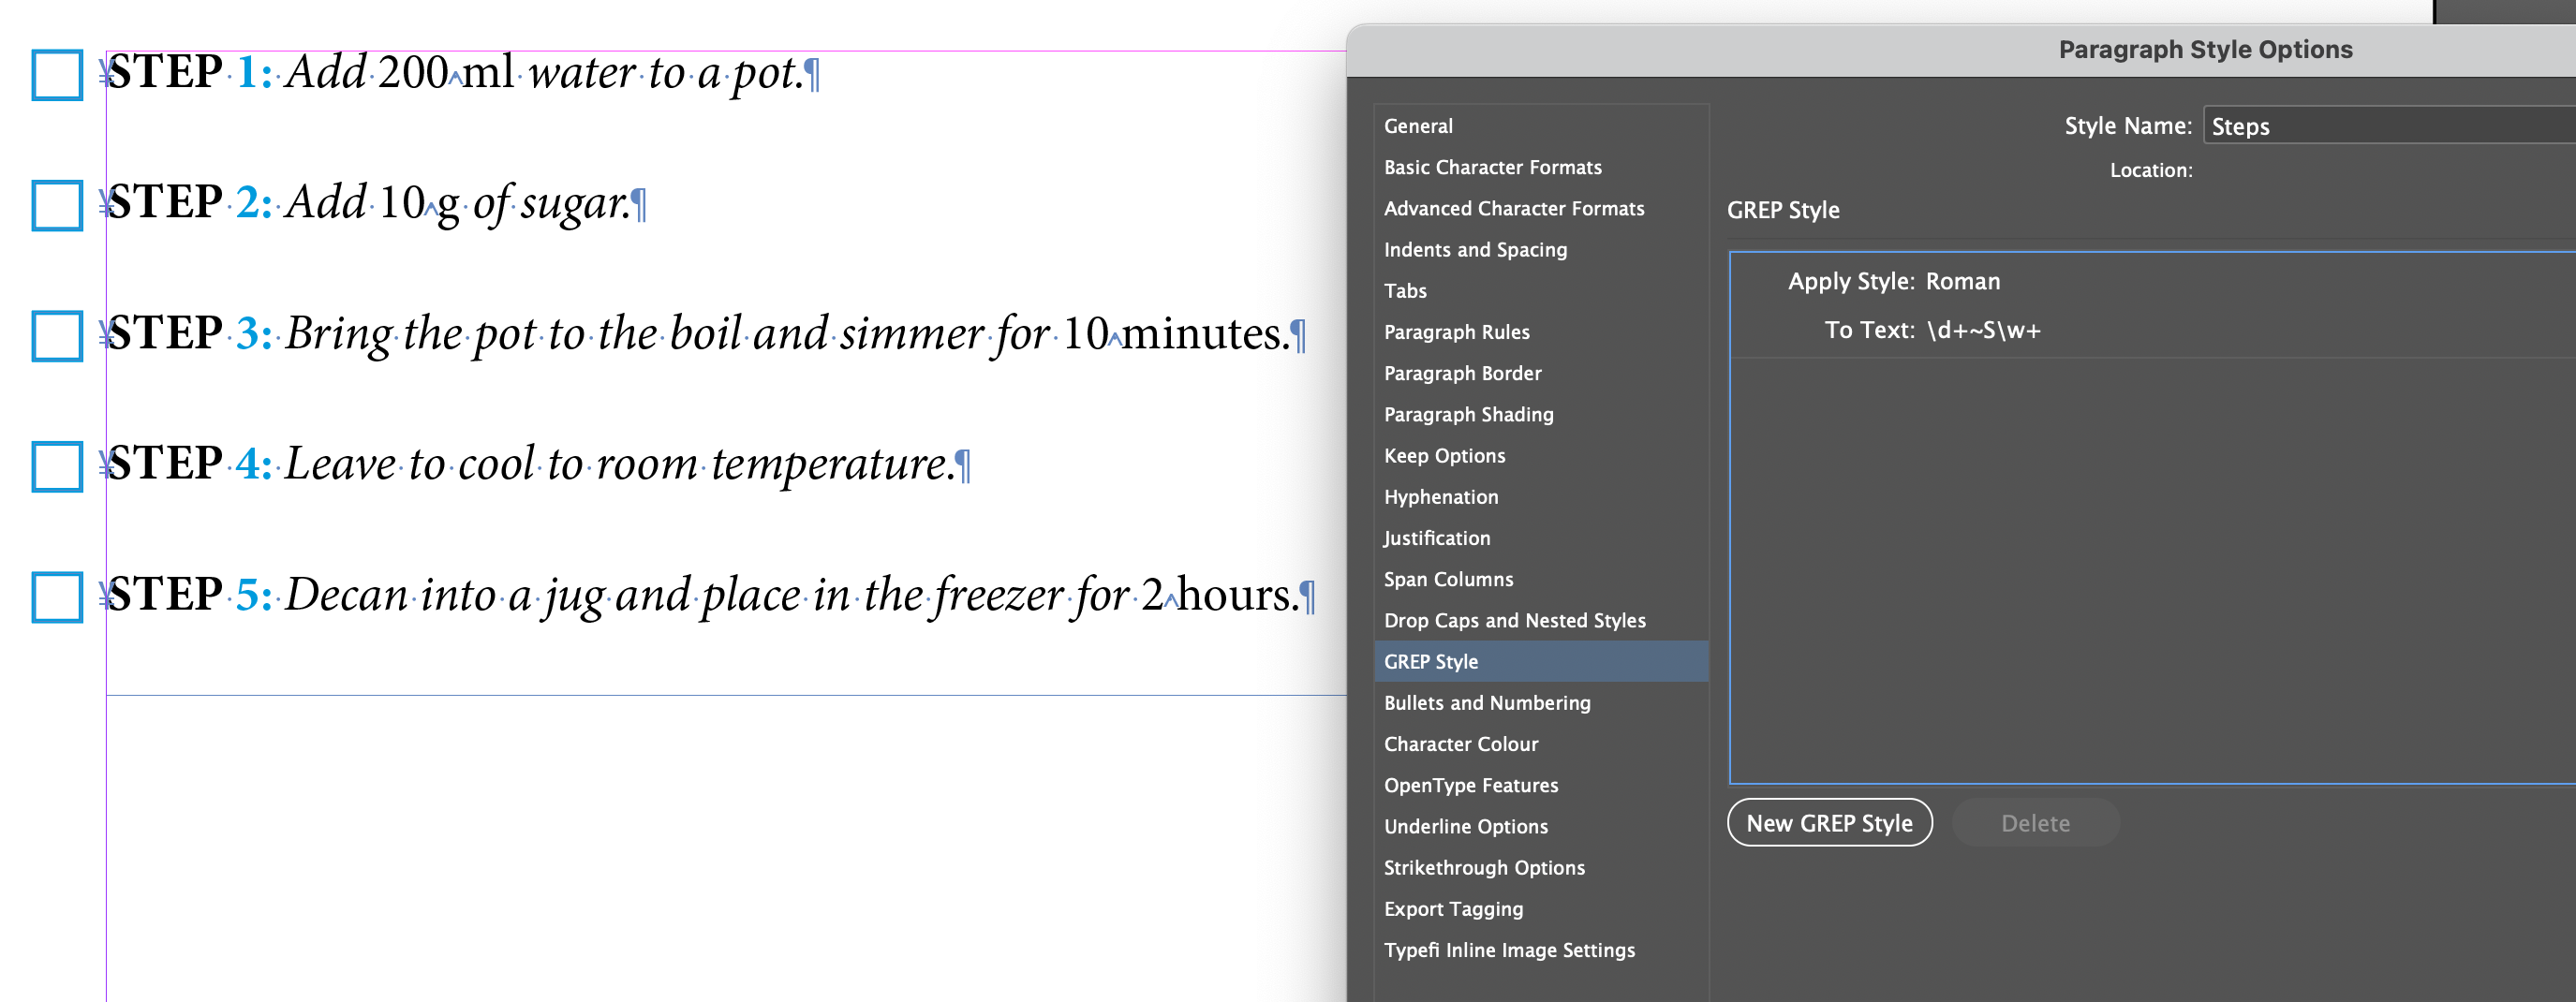
In this example, the GREP expression \d+~S\w+ defines where the style “Roman” should be applied within the text.
- \d+ = any repeated digits
- ~S = non-breaking space
- \w+ = any repeated text character
This expression is looking for digits within the text that are immediately followed by a non-breaking space and one or more text characters. The quantities in the list of steps follow this pattern, so each gets the Character Style “Roman” applied to it.
This is just scratching the surface of what you can do with InDesign GREP Styles. Check out these free GREP resources from CreativePro for more.
3. Auto-apply styling to save time
Many publications use feature boxes or callout boxes to emphasise pieces of content. These boxes typically have the same styling throughout the publication but with varying content.
Styling this content in InDesign can be painfully slow since you have to select the frame, style the paragraph, and repeat for each box. It’s repetitive and tedious, but don’t fret—there is a better way!
InDesign has some built-in features that can drastically reduce the number of clicks needed to accomplish this styling. All it takes is a bit of setup when creating the Object and Paragraph Styles.
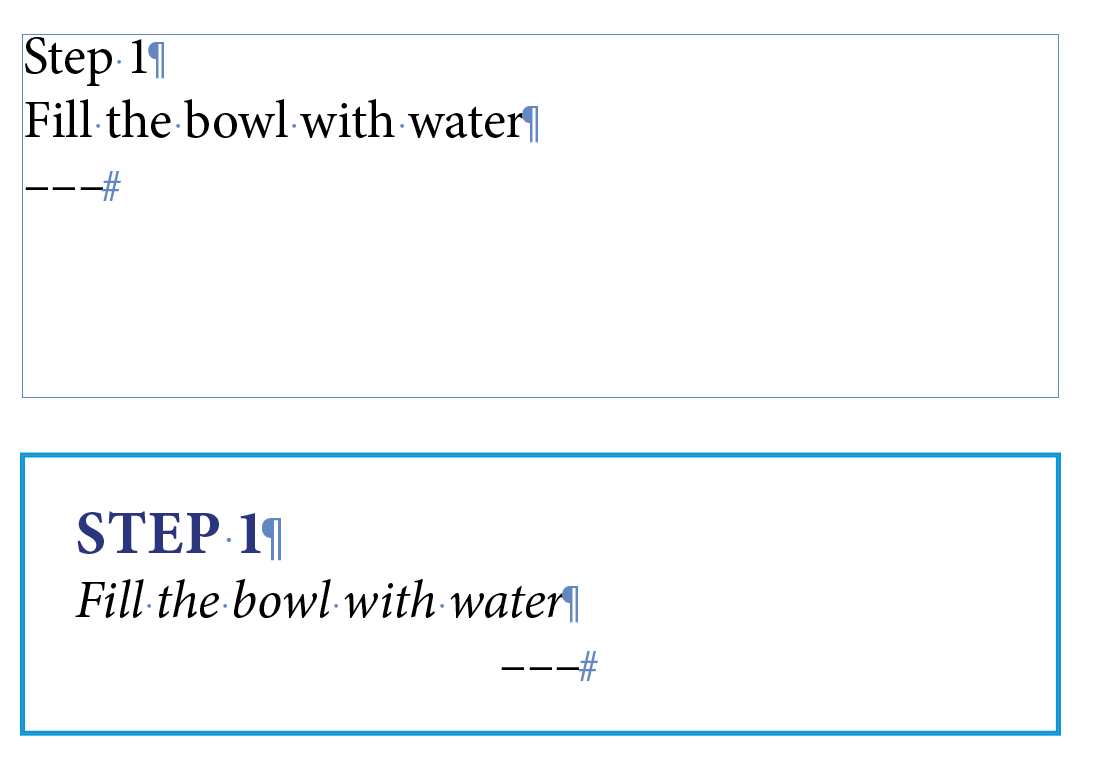
Let’s use these boxes as an example. When the setup is done, we’ll be able to apply the styling of the lower box to the upper with just one click.
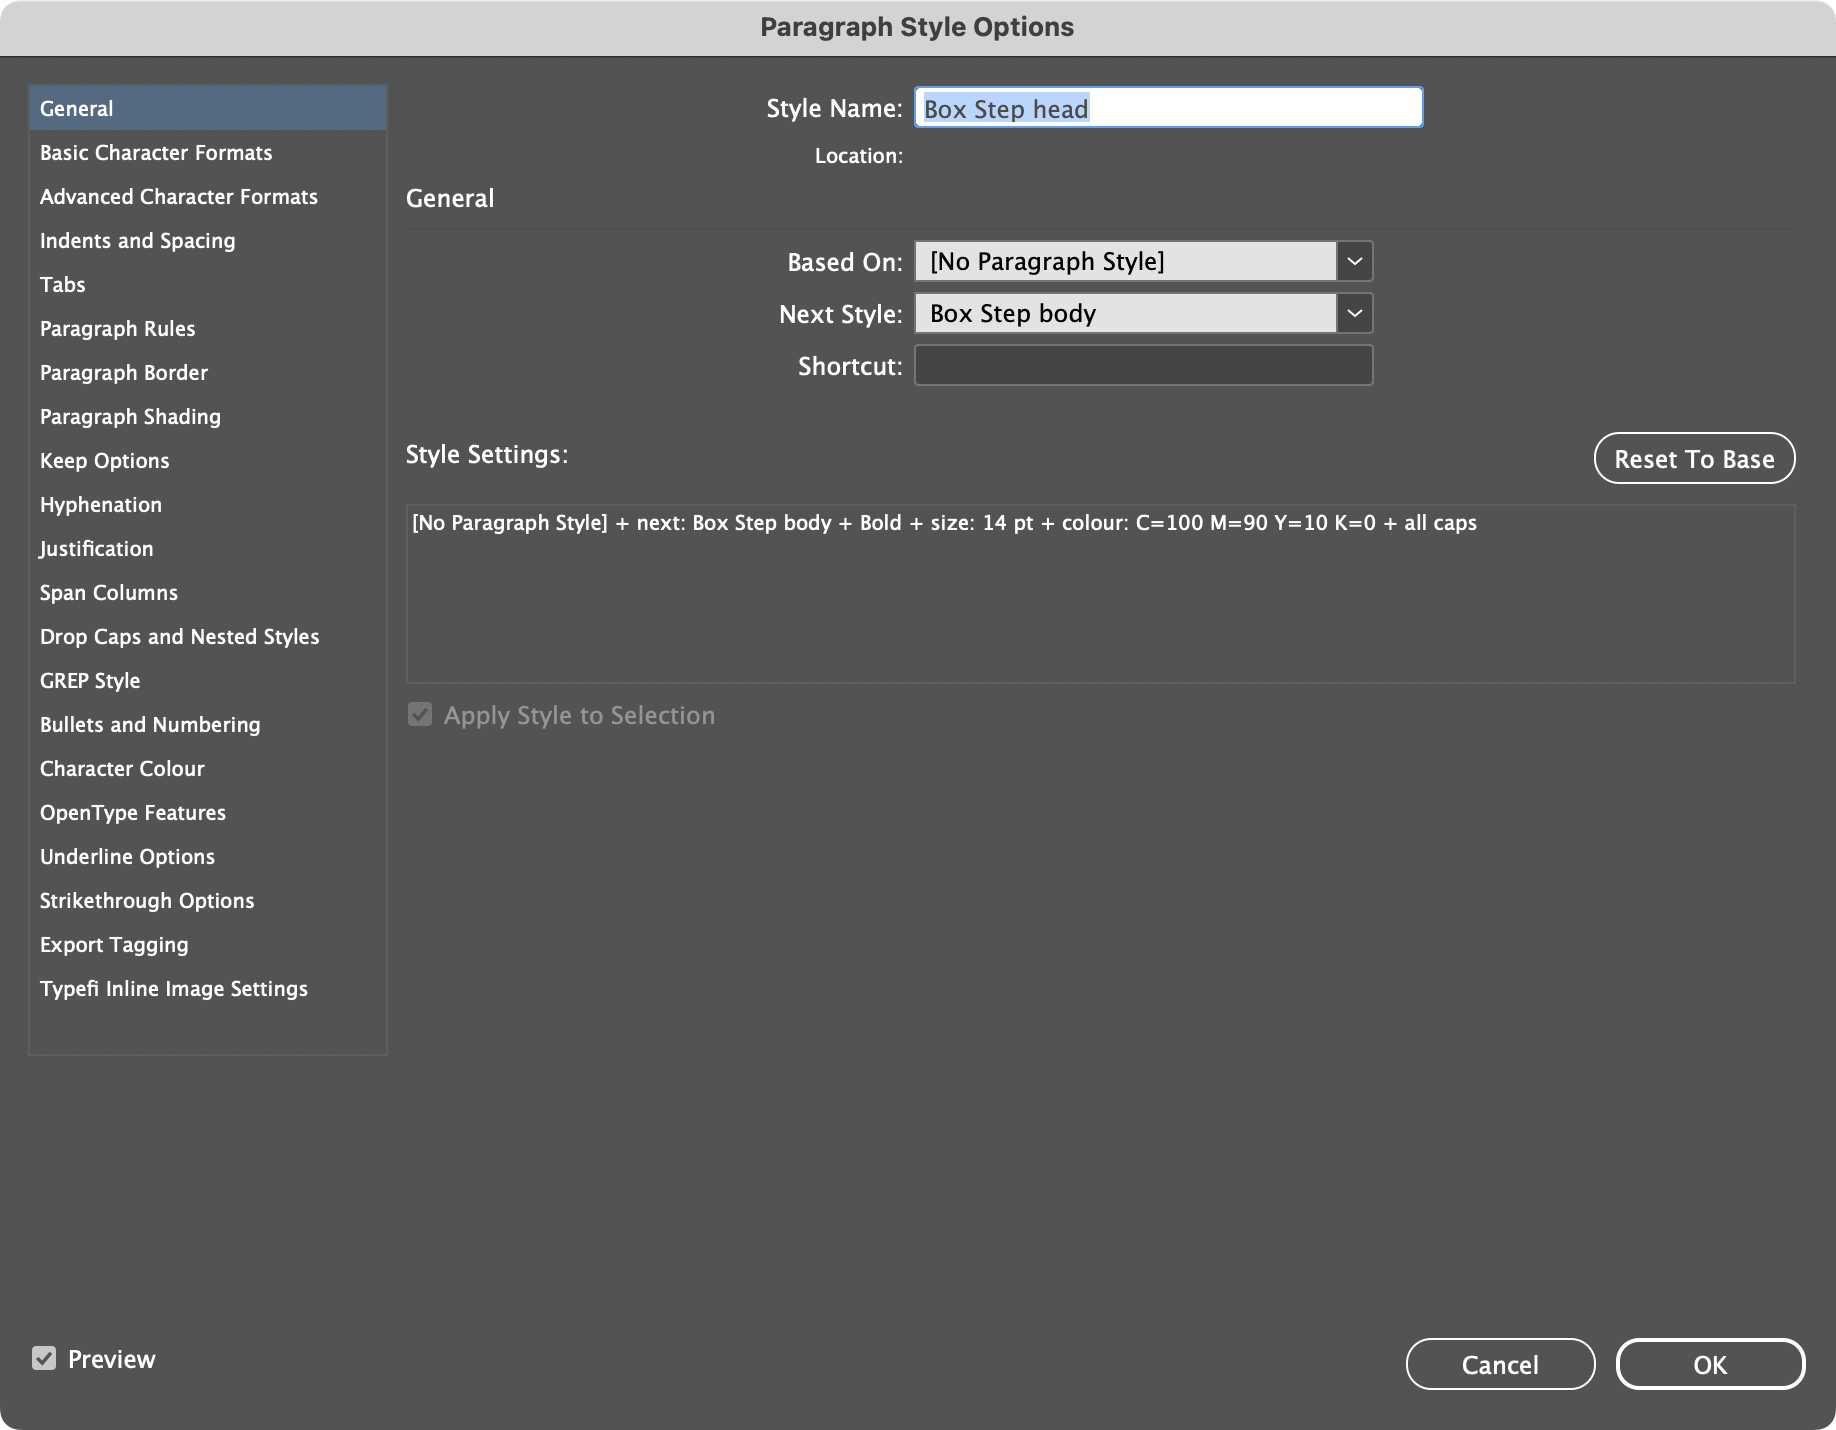
- First, create Paragraph Styles for each of the paragraphs. I’ve called them “Box Step head,” “Box Step body,” and “Box Step end.”
- In “Box Step head,” set General > Next Style to “Box Step body.”
- For “Box Step body,” set General > Next Style to “Box Step end.”
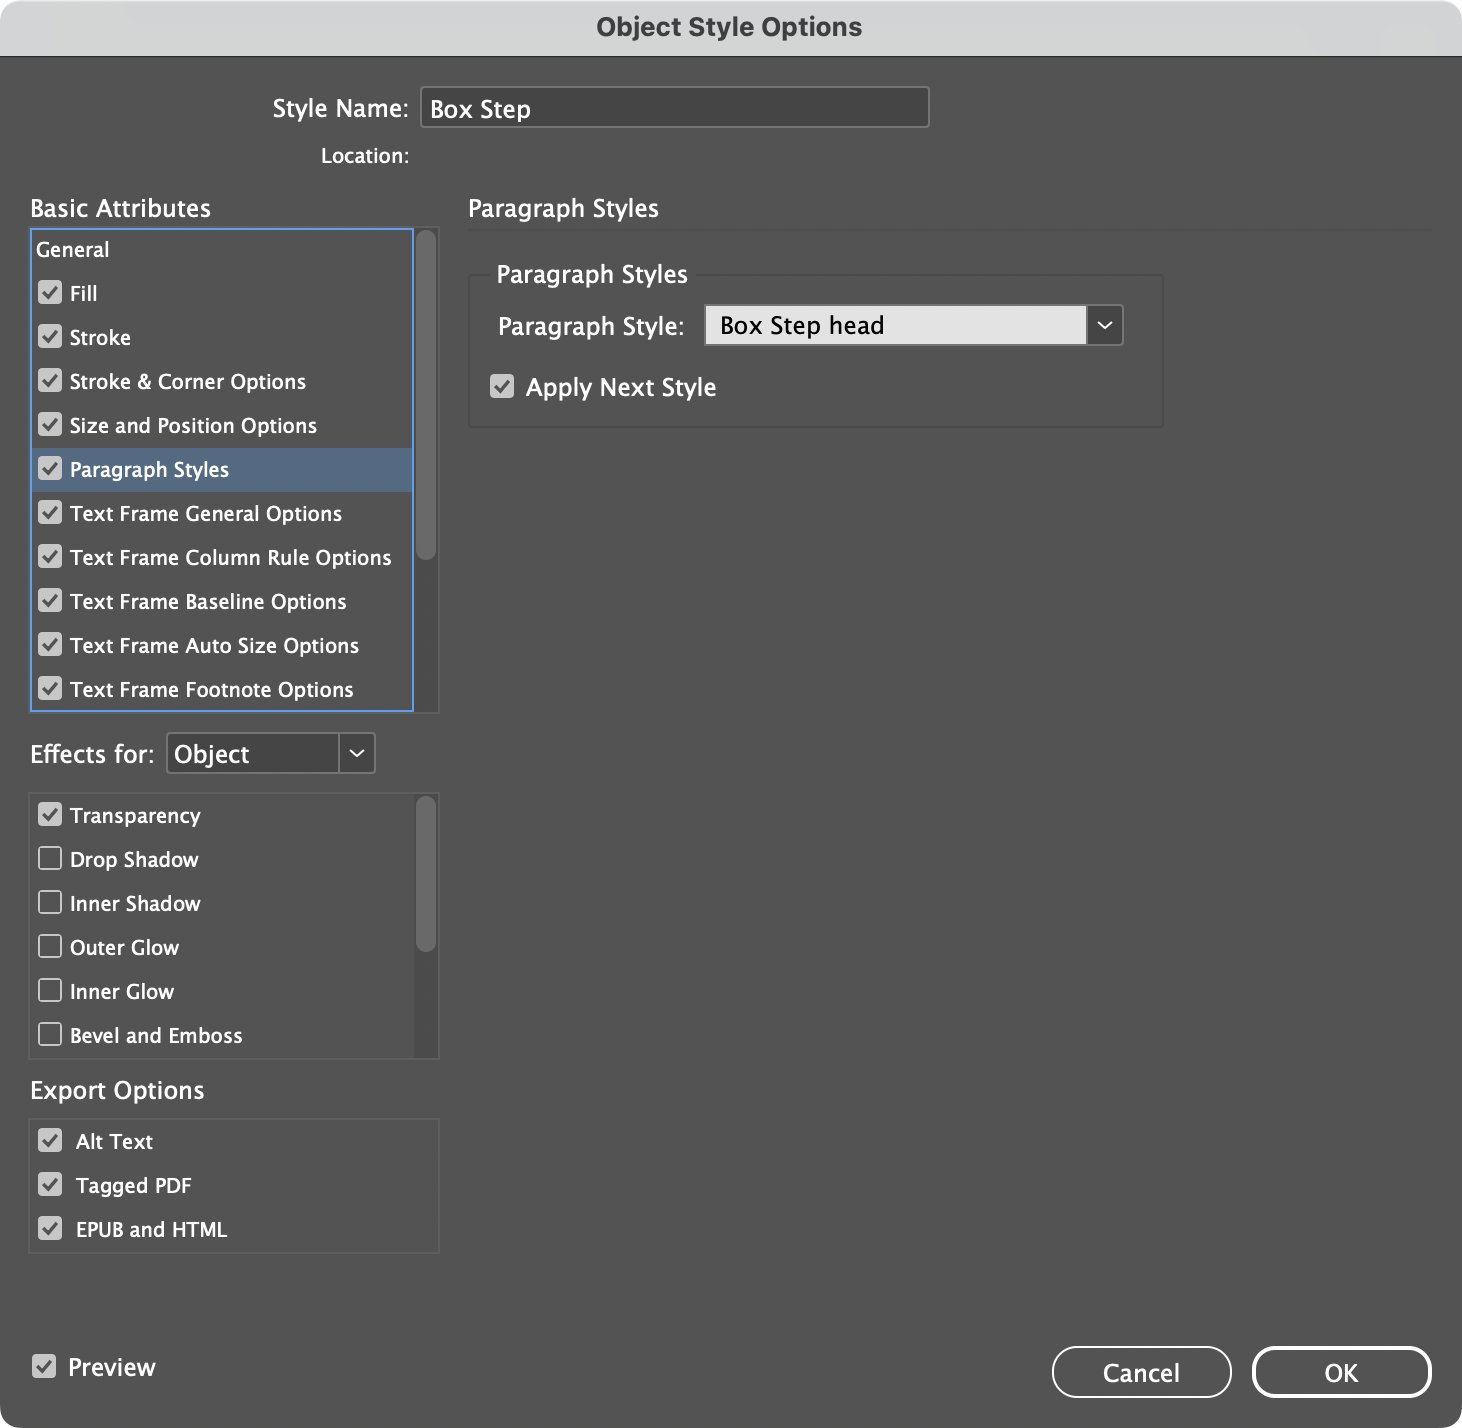
- Next, create an Object Style for the frame. Let’s call it “Box Step.”
- In the Object Style options, set Paragraph Styles > Paragraph Style to “Box Step head” and tick “Apply Next Style.”
- Optionally, you can create a keyboard shortcut via General > Shortcut to apply this Object Style using a hotkey (useful if you have tons of these boxes in your document).
I know that seems a bit complex, but stay with me!
What we’ve done is set up the “Box Step” Object Style so that the “Box Step head” Paragraph Style is automatically applied to the first paragraph in the frame.
And, because we set a Next Style on “Box Step head,” the other Paragraph Styles are also applied with no extra work—“Box Step body” is applied to the next paragraph in the frame, and “Box Step end” is applied to the paragraph after that.
Test it out once you’ve set up the Paragraph and Object Styles. Select your frame with the selection tool and apply Object Style “[None]’ and then Paragraph Style “[Basic Paragraph]”. Then, click on the Object Style “Box Step” and watch the magic happen.
This method will work anywhere you use Object Styles, it’s not limited to only boxed content. Just make sure to define the Object Style’s Paragraph Style and apply a Next Style to your Paragraph Styles!
4. Get more from Paragraph Rules and Shading
Paragraph Rules are an immensely powerful feature of InDesign with many different applications.
They can help minimise repetitive tasks by enabling the creation of design features as part of the text, they can be layered for some interesting effects, and they’ll save you time because the formatting and design will remain constant even if the content changes.
There are three places to create rules within a Paragraph Style:
- Paragraph Rules > Rules Above, Rules Below
- Paragraph Border
- Paragraph Shading
First, let’s break down the ordering (layering) of the various rules.
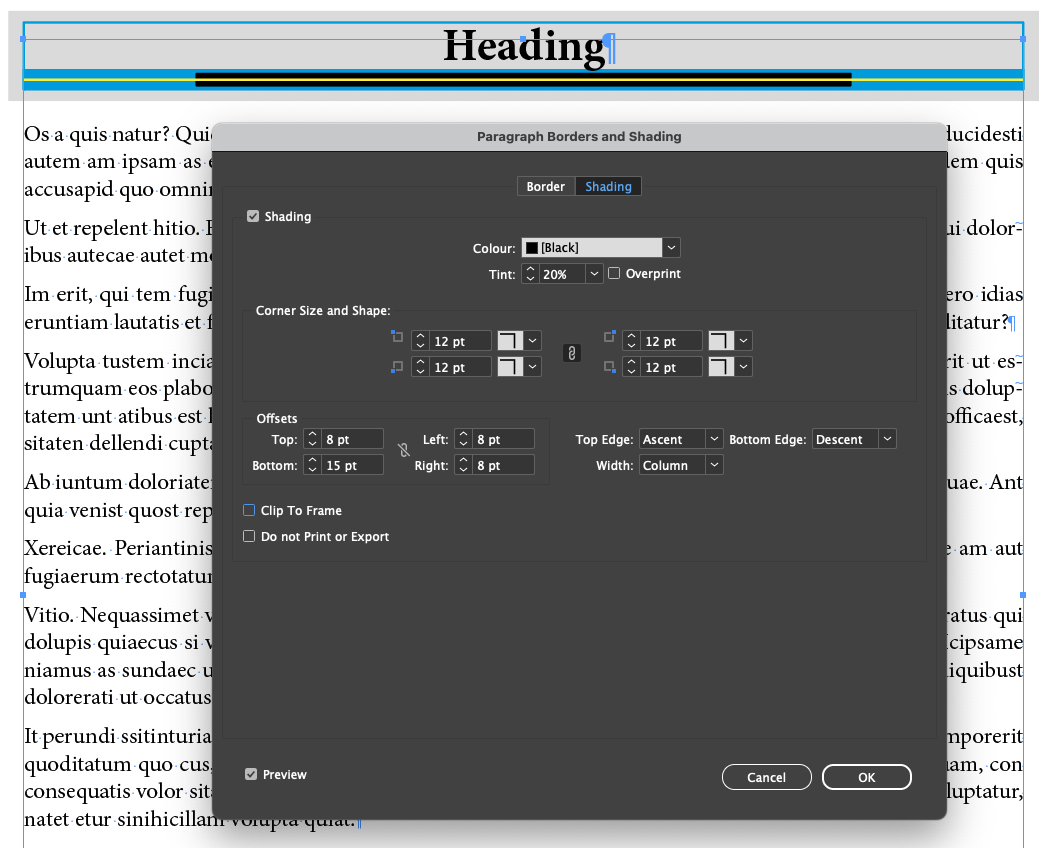
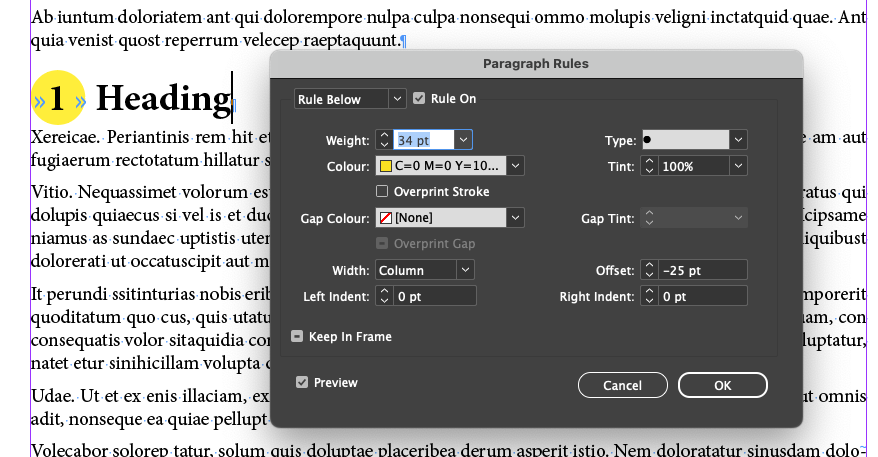
- The Rule Below will appear on top of Rule Above when they overlap. In the example below, the black rule is Rule Above—it is set up to appear below the heading. The yellow rule is Rule Below, so it overlays on top of the black rule.
- Paragraph Borders appear behind both Rule Above and Rule Below. This is the same whether the Rule Above or Rule Below appear above or below the text.
- Shading appears as the very bottom layer behind Rule Above, Rule Below, and Borders.
- Lastly, all of the above are behind the text.
You can leverage this knowledge to create some interesting design features as part of the text—a more flexible alternative to building separate boxes as anchored objects.
Use Paragraph Border to create bulleted heading numbers
Paragraph Border can do more than just surround your text with a line. There’s a lot of flexibility within the Stroke settings, and we can use that to our advantage.
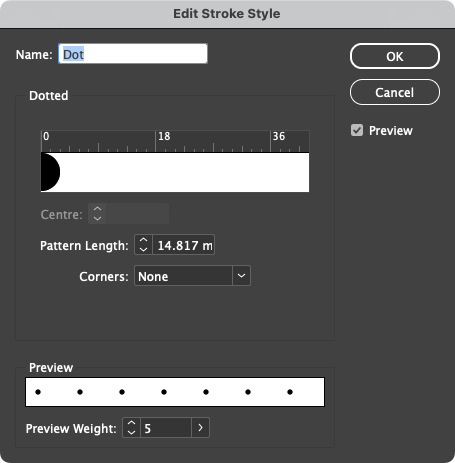
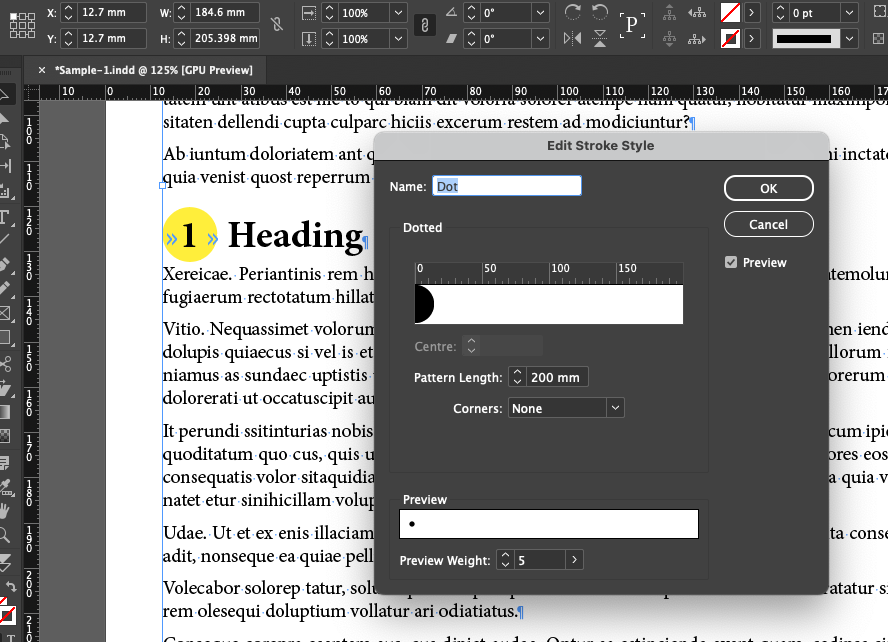
In this example, I’ve created a new Stroke Style—to do this, open the Stroke panel then click the hamburger menu at the top right. Select Stroke Styles > New.
The goal is to set up this style so that only a single dot appears. The trick is to space the dots very far apart (see screenshot).
Once your new Stroke Style is saved, you can apply it within the Paragraph Border settings.
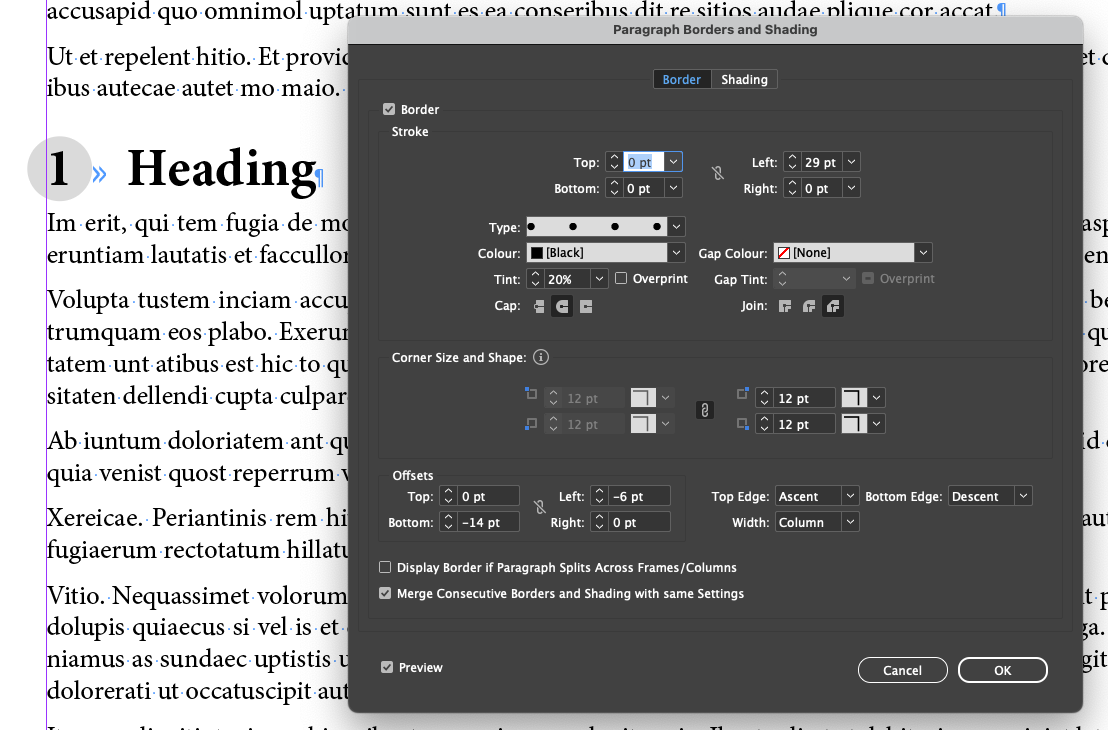
This example is perfect for adding a bullet to single-digit numbers, but another version would need to be made for numbers with two or more digits.
Use Paragraph Rule Above to create bulleted heading numbers
You can achieve the same bulleted heading number style using Paragraph Rule Above.
For this method, use the same Stroke style as above but adjust the Pattern Length so it is longer than the frame width.
5: Set your default styles
InDesign applies default style settings whenever you create a frame or add text. These defaults are quite basic, but they can be easily changed to suit the needs of a project.
InDesign style defaults can be set within specific documents, or for InDesign as a whole. They can be set for numerous different InDesign parameters, including:
- Object Styles
- Stroke
- Swatches
- Paragraph Styles
- Character Styles
- Table Styles
- Cell Styles
- Text Wrap
Say you need to create dozens of boxes with red borders. It would be tedious to restyle them manually, even if using a keyboard shortcut. Fortunately, you can create a default Object Style setting to apply this styling automatically to every new box!
How to set InDesign default styles
For this example, we’re going to set defaults in the Paragraph Styles panel, but the same technique can be applied to almost any style in InDesign.
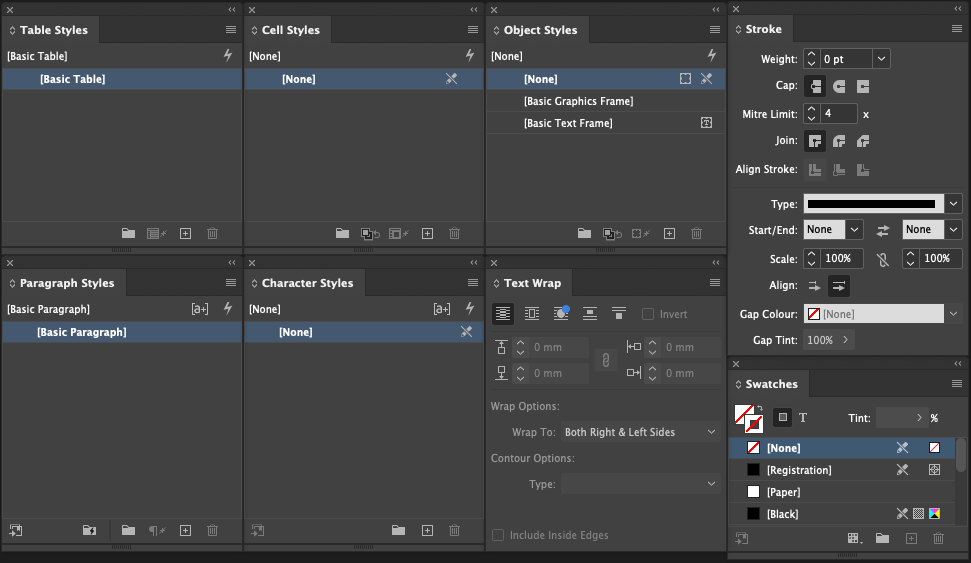
- Open up InDesign. Don’t create a document—just open the eight panels shown in the screenshot above.
- Set the state of each panel as in the screenshot. If you already have some styles, that’s fine—just make sure you select the Basic or None styles for this example (the styles you select at this point will be the default styles for every document you create).
- Create a new Paragraph Style and give it a name. Click on your new style in the panel to highlight it.
- Create a new document: File > New > Document
- Create a text frame within your new document—your new Paragraph Style should be applied by default!
By editing and applying styles before opening a document, you can edit the InDesign default styles. Any changes you make will be applied to every new document you create.
You can also reset your defaults by going back to the style panels without a document open and selecting the Basic or None styles.
How to set InDesign document defaults
In this example, we’re going to create default styles specifically for a document we already have open. These defaults won’t apply to any documents other than the one where we make these changes.
- With your document open, use the Selection Tool (hotkey: V) to click on an empty part of the page or pasteboard. There’s nothing special about this, we just need to make sure nothing is selected.
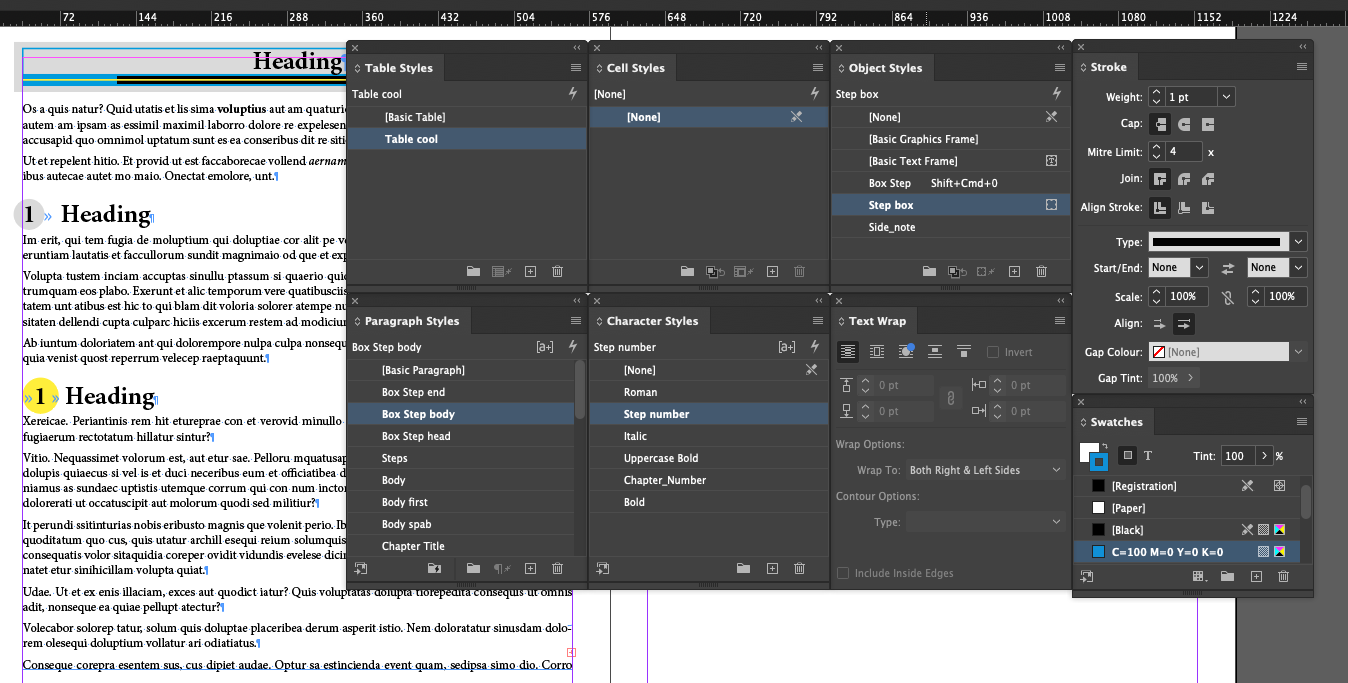
- Open the panels for the styles you want to have new defaults. You should see some styles already highlighted—these are the current defaults. In the screenshot below, you can see the defaults in my document.
- Create a new frame. The highlighted styles shouldn’t change, meaning the defaults are applied to the frame. Then, deselect your new frame.
- Without anything selected, create your new default styles and apply by selecting them within the style panels. Again, make sure nothing is selected when you do this!
- Next, create a new text frame. Your customised defaults should be applied!

The above screenshot shows my new default settings—I’ve changed everything to the base styles since I previously had customised defaults.
Notice that there are still some overrides on the default Object Style. This is because I’ve defined some additional defaults within Document Footnote Options.
To edit these settings (and other defaults not within style panels), make sure nothing is selected, then use Quick Apply to search for the default you want to change.
Do more with Adobe InDesign
I hope you can use these tips to work faster and get more done with InDesign. Check out our other articles for more InDesign tips!
- More ways to use InDesign Paragraph Styles
- How to use InDesign scripting to automate charts and graphs
- Free InDesign scripts by Peter Kahrel
- Learn the basics of GREP
- Footnote workarounds and scripts for InDesign

Damian Gibbs
Solutions Consultant | South Africa
Damian started out as an apprentice typesetter over 20 years ago at a leading South African educational publisher, and from the start was curious about the opportunities that digital technologies bring to publishing. He transitioned to general market publishing and eventually became a service provider to local and offshore publishers covering a diverse range of publishing markets, all requiring varying workflows and output requirements.
Damian has extensive experience working with publishers to develop and support automated publishing workflows and transition from pure print to digital outputs such as web, e-books, and CMS publishing.