This webinar, the second in our DO MORE with Scripting series by Peter Kahrel, addresses some practicalities of writing and using custom scripts in Typefi workflows.
You’ll learn about the script development environment (Adobe ExtendScript Toolkit), differences between InDesign Desktop and InDesign Server, interacting with the Typefi Engine, protecting the Typefi Engine’s environment by ringfencing custom scripts, Engine defaults, and testing and deploying scripts.
Overview
Welcome to the second webinar on Typefi scripts and scripting. In this session we’ll deal with some practicalities of writing and using scripts in Typefi workflows, including:
- The script development environment—Adobe’s ExtendScript Toolkit (ESTK);
- Differences between InDesign Desktop and InDesign Server;
- How your scripts interact with the Typefi Engine;
- How to protect the Typefi Engine’s environment by ringfencing your custom scripts;
- Engine defaults, which you have to know when you write scripts that communicate with the Engine; and
- Testing and deploying scripts.
This demo uses InDesign CC2018. For scripts this makes no difference—these scripts will work in CC2017 and earlier versions of InDesign.
This webinar is about making you familiar with some relevant parts of the Typefi Engine.
Script development environment (1:32)
This is JavaScript only. InDesign can be scripted with AppleScript and VBasic as well, but these two are platform-specific, so AppleScript works only on Mac and VBasic works only on Windows. On the other hand, JavaScripts can be used on both Mac and Windows platforms—they are platform-independent.
For the script environment, I use Adobe’s ExtendScript Toolkit. It’s a script editor that comes with several development tools, and it can be used for all scriptable Creative Cloud applications. It’s a separate download which is accessible through your Creative Cloud panel.
When you first start the ESTK, it shows various windows. These are useful but take up screen space, so I open them only when I need them. The console, which you see on my screen, I use all the time. The other windows are accessible in the Window menu.
When you start a new script file you first of all need to select the application that you target in this dropdown.
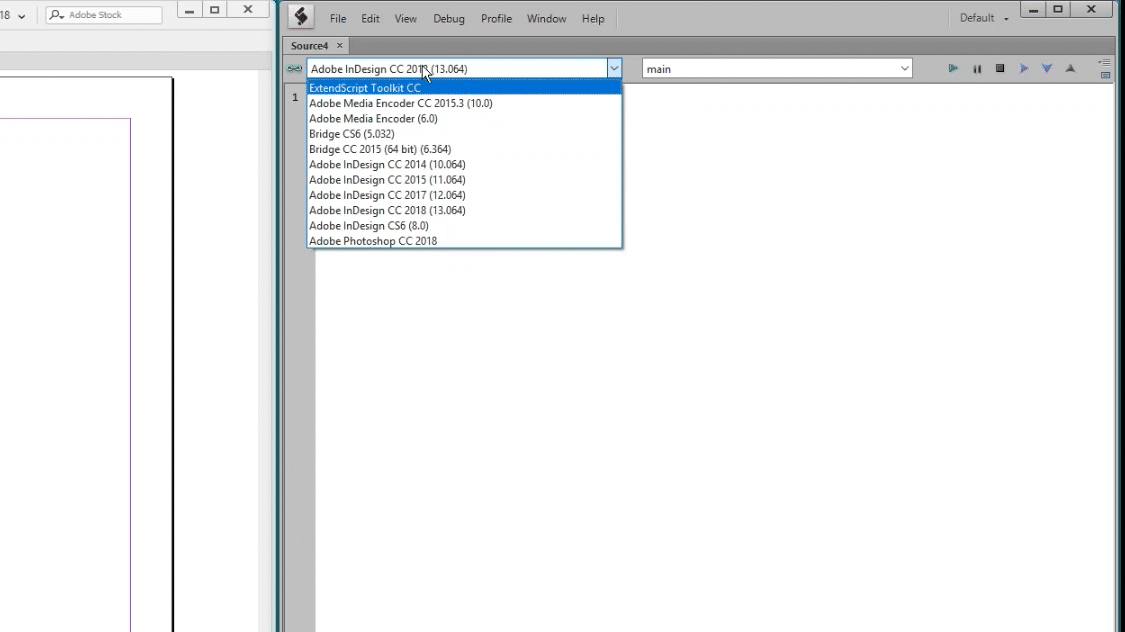
The applications that you see here depend on whatever is installed on your computer, so as you can see here I have several versions of InDesign going back to CS6, Photoshop, and a few others.
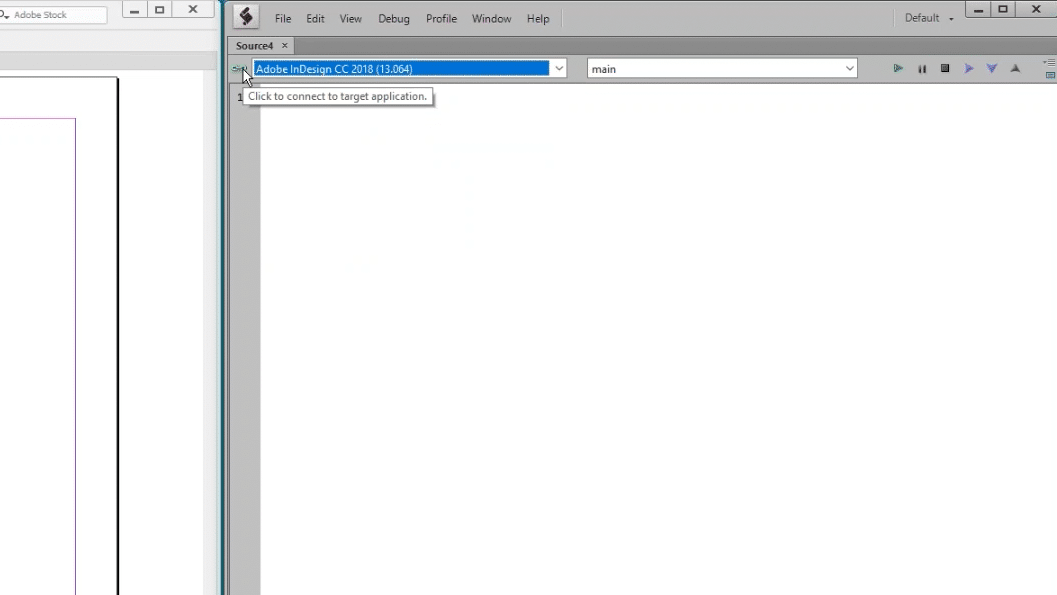
You must also make sure that the icon next to the target application menu is green, which shows that the ESTK is connected to InDesign.
In the Help menu there is a short, basic Adobe Intro To Scripting. Object Model Viewer we’ll use extensively later (or one of its third-party alternatives). And the JavaScript Tools Guide CC documents the ESTK and its functionality. This is a useful document—it’s very extensive and it has a chapter on the ESTK’s interface.
On Windows PCs, the ESTK works quite well generally, but on Mac there are two problems. The first of the problems is what is referred to as ‘app nap’, which means that sometimes the ESTK takes a nap when you expect it to execute a script, and the editor can be unresponsive from time to time. Unfortunately, there’s not much that you can do about it.
Secondly, Apple has announced that with the next major release of OSX (probably in the summer of this year, 2018), 32-bit applications (like the ESTK) will no longer be supported, which leaves Mac users without a proper development environment. A ludicrous situation, and at the moment (January 2018) it’s not clear what’s going to happen.
For now I’ll deal with the Windows setup, in which the ESTK works pretty well.
InDesign Server vs. InDesign Desktop (5:30)
InDesign scripts that run in InDesign server (as all scripts do when they run as part of an InDesign job on a server), differ in some subtle but important details from those that run in InDesign Desktop—that is, the InDesign version installed on your desktop, and which is used when you installed Typefi Desktop Server.
The main difference between InDesign Desktop and InDesign Server is that InDesign Server doesn’t have an interface—it’s a so-called headless application.
This means that InDesign Server doesn’t use any script property that has ‘active’ in its name (because ID Server has no interface, so the notion ‘active’ doesn’t apply). You may have seen InDesign scripts on a forum or in a printed text that referred to the current document as app.activeDocument, and other comparable property names are activePage and activeWindow. However, these names cannot be used in InDesign Server, but there are equivalent properties: for instance, use app.documents[0] instead of app.activeDocument.
InDesign Server also—naturally—doesn’t know selections: you can’t select anything in InDesign Server, so you have to get access to the document, story, page, etc. in some other way. This will be illustrated later.
There is one script function that’s different in ID Server and ID Desktop, namely, PDF export. Though you would normally use the Typefi Server’s Export to PDF action, it can nevertheless be necessary to export a document by a script or as part of a script. In a script you can determine which InDesign version a script is running in by the application’s name property:
if (app.name === 'Adobe InDesign') { //ID Desktop
  myDocument.exportFile(ExportFormat.PDF_TYPE, myPDF, false, myPreset);
} else { // ID Server
  myDocument.exportFile(ExportFormat.PDF_TYPE, myPDF, myPreset);
}
(When run in ID Server, app.name returns ‘Adobe InDesign Server’.)
The difference is in the false parameter. In the Desktop version, this parameter indicates whether InDesign should display the Export Adobe PDF dialogue, but since ID Server has no interface, that parameter is not present in the export function.
The points outlined here pretty much exhaust the differences between the two InDesign versions. They are few, but important.
Protecting the Typefi environment (8:42)
The Typefi Engine is a JavaScript itself and virtually all the scripts you write will interact to some extent with the Typefi Engine. You must therefore ringfence your script to ensure that it does not interfere with the Engine.
The best way to accomplish this is to format your script as a so-called self-executing anonymous function. This mouthful simply means that a script should be wrapped as follows:
(function () {
  // Script code goes here
}());
This construct works in both Server and Desktop versions of InDesign.
Secondly, and equally importantly, you must ensure that all your variables are confined to your script, which you achieve by declaring them as such:
(function () {
  var myPage = app.documents[0].pages[-1]; // Correct declaration
  myPage = app.documents[0].pages[-1]; // Wrong: myPage is not declared
}());
The first line, in which myPage is declared as a variable, restricts the scope of myPage to the function in which it is defined, in this case, our script (because the script is a function).
The second line, in which myPage is not declared as a variable, broadcasts myPage throughout the script environment, overwriting any existing instances of myPage, even in the Engine. It is therefore crucial that any script you write is wrapped in an anonymous function and that its variables are defined with the reserved word var.
This cannot be stressed enough: make variables local or you run the risk of messing up other scripts, including the Engine.
Typefi Engine defaults (12:17)
The Engine sets some document properties that remain in force throughout the document’s production. Immediately after opening a template, the Typefi Engine sets the document’s rulers to per page and the measurement system to points because these are the most convenient settings to work with. When the job finishes, the original settings are restored in the paginated document.
If you want to use different rulers and/or measurement units you can set them in a script, but you must restore those settings when the script finishes. The Engine sets them only once, at the start of the job, so when a script changes them during pagination, those changed values remain in force.
Thus, if your script changes the units from points to millimetres at page.end, that script must restore the units to points before handing back control to the Engine. If you don’t, the Engine’s measurements go all over the place and you might end up in a very tight place!
Setting measurements and rulers is relatively time-consuming, and you’re advised to change these only when it’s really necessary.
Demo (Part I): Writing a script for a Typefi job (13:19)
Let’s have a look now at the practicalities of writing a script that’s supposed to run in a Typefi job. For our first script we set ourselves a modest task so that we can concentrate on the logistics: we want a script that keeps the last eight characters of every paragraph together to prevent runts—that is, short last paragraph lines. To do this interactively, you’d use a Find/Change operation.
(‘Short’ is of course a matter of taste, and is also determined by the column width, but let’s say that for our purposes, eight characters is the minimum length of a paragraph’s last line.)
When you start writing a script, the first question you ask is at which script event the script should run. Well, since this script doesn’t rely on geometry, and since it can change the text flow, the best moment is at spill.end. Recall that spill.end occurs every time a story story is placed (‘spilled’).
The basic script itself is not too difficult. We’ll use InDesign’s GREP replacement to apply no-break to the last eight characters of every paragraph:
app.findGrepPreferences = app.changeGrepPreferences = null;

app.findGrepPreferences.findWhat = '.{8}
(If you’re not familiar with GREP, you can do yourself a great favour by learning some of it.)
The question now is: What is myStory? How can a script see it? In your desktop version it’s the insertion point’s or the selected text frame’s parent story. In ID Server we have no selections; but at spill.end we do have the spilled story. Though indirectly, because what the Engine provides is a text frame rather than a story, but if you have a text frame you automatically have its parent story. The relevant Engine property is:
TYPEFI.inddSpillFrameLet’s look at this in some detail. The Typefi Engine is a large collection of properties and functions, all subsumed under the global variable TYPEFI. This variable has scope over the whole JavaScript namespace. But, naturally, the TYPEFI object is available only when the Engine is running during a job, while we’re sitting here looking at an open document and a script in a script editor but without a running Engine.
What we need to do is to create our own TYPEFI object that matches the ‘real’ Engine but is triggered only when our script is running outside the Engine. When the script is running in a job, our own version of the Engine properties and functions should be ignored. We do that as follows:
(function () {
  if (typeof TYPEFI == 'undefined') {
    TYPEFI = {
      inddSpillFrame: app.selection[0]
    }
  }
  // Rest of the code
}());
We call this our interactive framework. The crucial test is in if (typeof TYPEFI == 'undefined'): it reads ‘if the TYPEFI object does not exist’. Therefore if we run this code on our desktop while we develop a script, the TYPEFI object is created on the fly, in this case with a single property. It’s a minimal framework, but it can be expanded to accommodate various things as we need them.
In this example, note that the Engine hands us the frame into which a story was spilled, not the spilled story itself. But when you have a text frame you also have its story, and our runt-prevention script can now be done as follows:
(function () {

if (typeof TYPEFI == 'undefined') {

TYPEFI = {

inddSpillFrame: app.selection[0]

}

}

app.findGrepPreferences = app.changeGrepPreferences = null;

app.findGrepPreferences.findWhat = '.{8}
To try this in our document, we’ll run it interactively first so that we can catch and fix any problems. We could do that in a running job, but that’s just inefficient, it takes much longer. Then it’s time to test the script in a job. After uploading the script to the Typefi Server, we add it to the Spill end field in the Event Scripts tab of our Typefi workflow, and then run it.
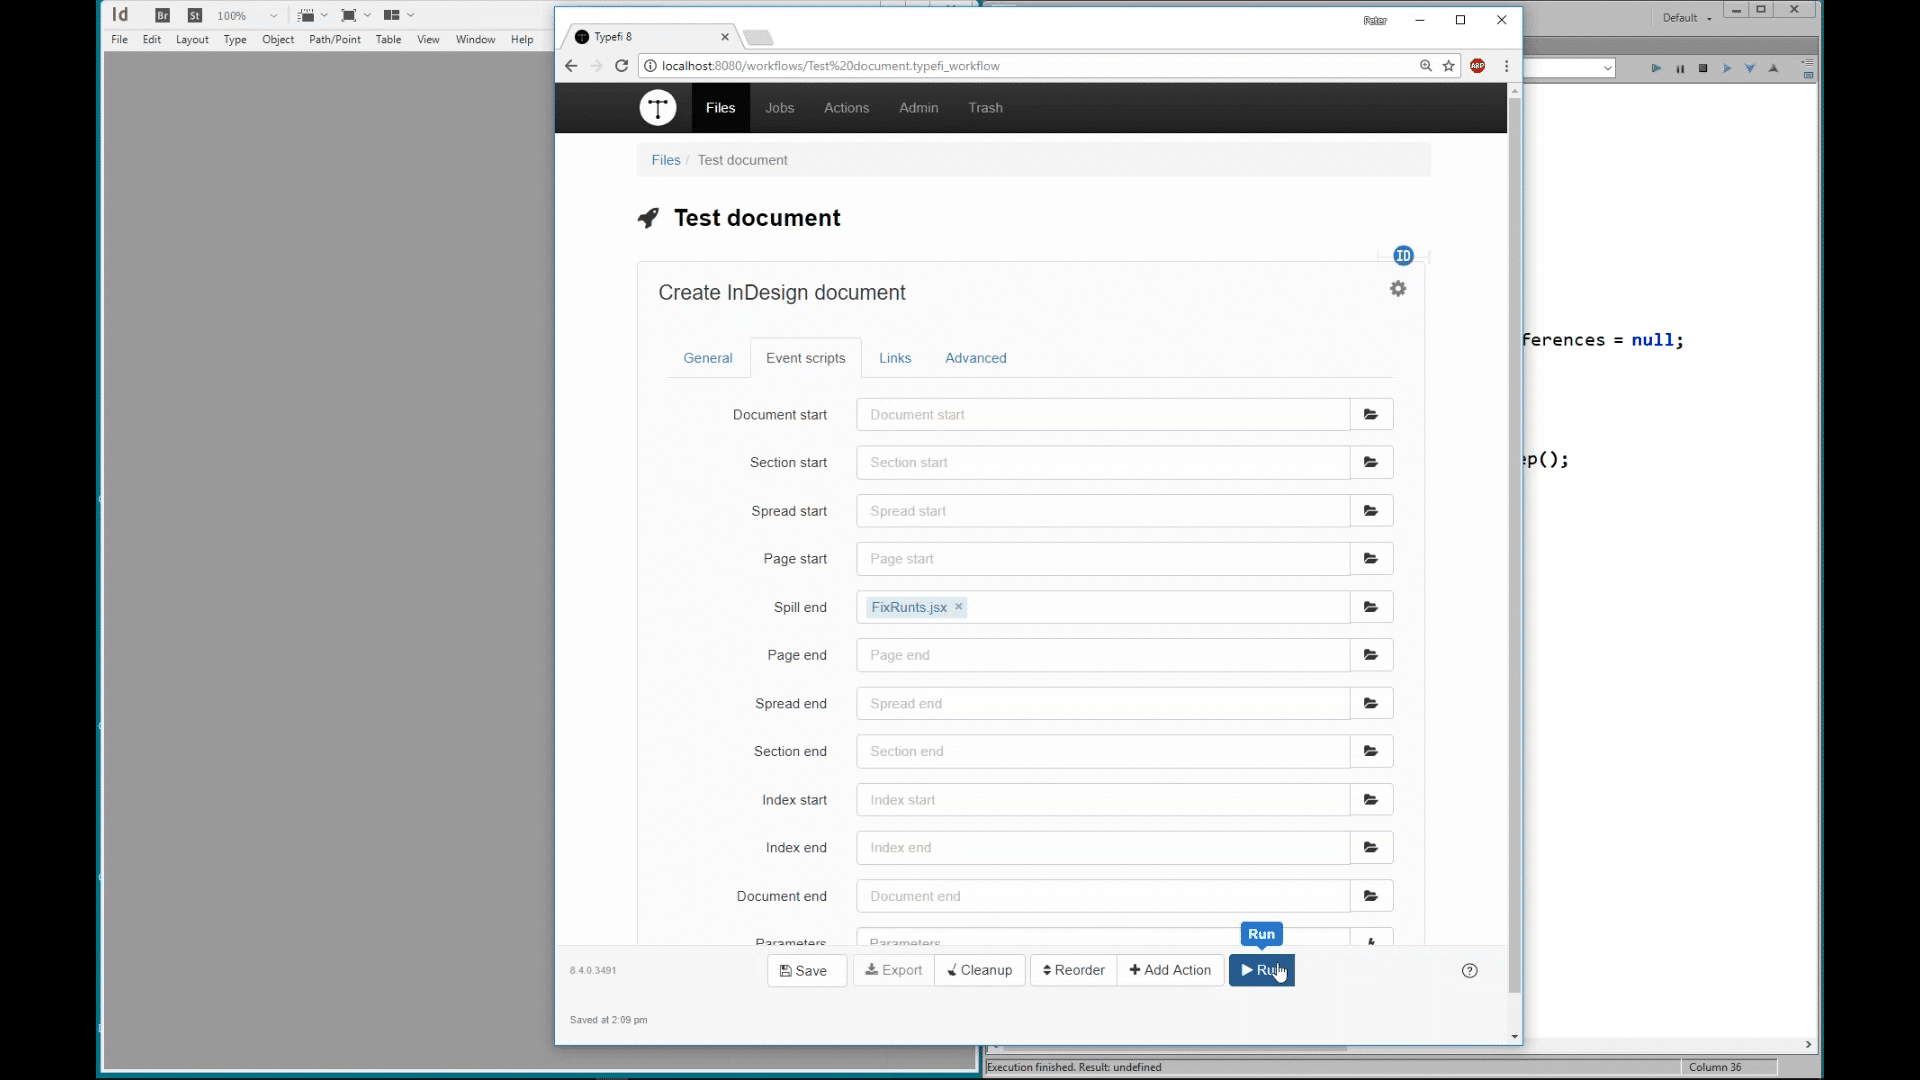 That works fine. We now have the beginning of a usable framework to write Typefi scripts in.
Demo (Part II): Using a script framework (23:25)
We’ll call this code our interactive framework:
  if (typeof TYPEFI == 'undefined') {
    TYPEFI = {
      inddSpillFrame: app.selection[0]
    }
  }
This is a modest framework with just one property, but you can add more as you need them. Let’s add a few that always come in handy: references to the active document and page, and some functionality for logging:
(function () {
  if (typeof TYPEFI == 'undefined') {
    TYPEFI = {
      inddDocument: app.documents[0],
      inddPage: app.windows[0].activePage,
      inddSpillFrame: app.selection[0],
      log: {
        info: function (m) {$.writeln ('Info: ' + m)},
        warn: function (m) {$.writeln ('Warning: ' + m)},
        error: function (m) {$.writeln ('Error: ' + m)}
      }
    }
  }
  // Rest of the code
}());
With this framework, TYPEFI.inddDocument is the active document, TYPEFI.inddPage is the active page, and inddSpillFrame we already know. Then there are three functions used for logging. The following line prints an info message in the Typefi job log when the script runs in a job:
TYPEFI.log.info ('Problem on page ' + TYPEFI.inddPage.name);When you run the script interactively, it prints the message in the ESTK’s console.
Again, I must stress that you must absolutely ensure that you don’t change any of the Engine’s properties while a job is running.
If over time your personal interactive framework grows, it might be cumbersome to copy it into your scripts all the time. You could place the code in a separate script file and link it into your event script, as follows:
(function () {
  if (typeof TYPEFI == 'undefined') {
    #include /d/scripts/TypefiFramework.jsx;
  }
  // Rest of the code
}());
Note the format of the file path: use forward slashes; and /d/ is the drive letter. This format works on both Mac and Windows. When you use this approach you should compile the scripts as a binary. The result is a script with the extension .jsxbin.
Conclusion (31:36)
The Typefi Engine’s properties and functions aren’t (yet) documented in a generally accessible way—we’re working on that. When in doubt, or when you have any questions, please post a query in our support forum.
This concludes our introduction of how scripts interact with the Engine. In the next episode we’ll turn to how scripts interact with the Typefi Designer plug-ins; in other words, the Typefi Document Object Model.
< Previous webinar | Next webinar >
About Peter Kahrel
Peter was born in Amsterdam, the Netherlands. He trained as a linguist at the University of Amsterdam and has an MA and a PhD, specialising in syntax, semantics, and typology. He has lived in the UK since 1994, working as a typesetter, editor, copy-editor, and indexer (and sometimes as a designer too) for publishers in the UK, the Netherlands, and Germany, preparing for the press both books and journals. He combined this with teaching at the Linguistics Department at Lancaster University.
Peter has been programming InDesign with JavaScript since 2003, mainly to cut out the tedium that faces every typesetter and indexer but in equal measure because it’s good fun. Peter has worked as a script developer at Typefi since 2010, and is highly regarded in the global InDesign scripting community.
Check out Peter’s website—which includes a bunch of free scripts—at CreativePro.